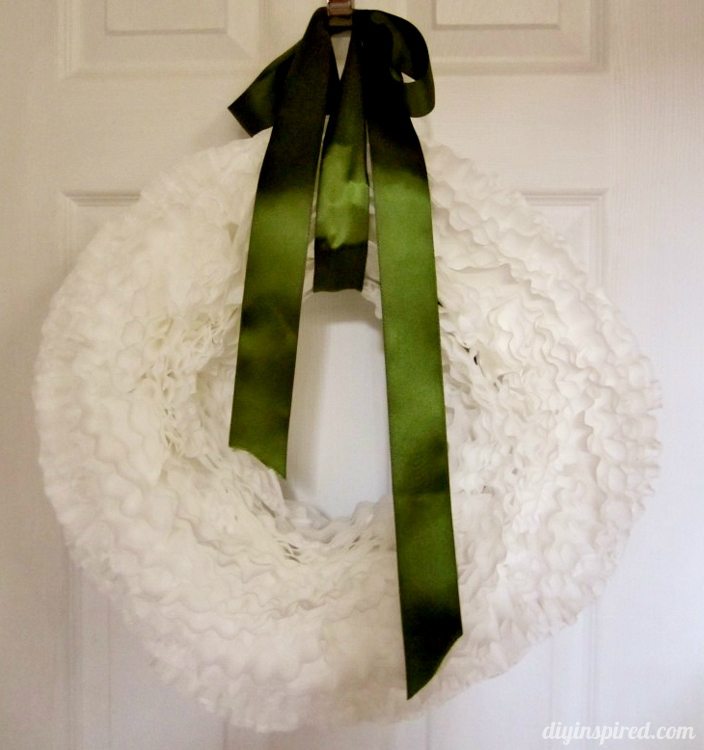
Coffee Filter Wreath
So I bought six feet of plumbing insulation tube at Home Depot to make this wreath out of antique book pages. The project only needed thirty six inches, so I had enough to make a second wreath. I had seen amazingly creative DIY projects made out of coffee filters, including wreaths, and with the holidays and changing season; I decided to give this Coffee Filter Wreath a try.
This coffee filter wreath was quite easy, I must say. The only thing (be forewarned) is that I kept burning myself with the hot glue gun. This never happens to me, but out of the 150 coffee filters I used I must have burnt myself 50 times! I even got a glue gun blister (occupational hazard).
Making the Coffee Filter Wreath
Here are the materials you need:


The beauty of this project is that the tube and coffee filters costs less than $3.00. I assume that if you decide to take this project on that you already have a glue gun and duct tape, which are essential materials in any craft closet.
Here is the step by step tutorial on how to make a coffee filter wreath.
First, tape the plumbing insulation tube together with the self-adhesive strips and then duct tape the ends together. It will look horrible, however with a little massaging and maneuvering you can shape it into a circle.


One by one, quarter each filter and overlap the flap. Using hot glue, attach each filter to your tube.


After the first layer (now the back of your wreath), turn it over and start layering. I found it easiest to bend the tip of your coffee filter (as shown) and then glue.


Continue gluing and overlapping until you reach your desired fullness. Here is mine about half way.

There you have it! I used a ribbon to embellish the wreath and to hang it.

More Repurposing and Upcycling Ideas:
- Upcycled Spoon Stamped Garden Markers
- Clever Repurposed Furniture Ideas
- Repurposed Thrift Store Serving Tray
- Recycled Jar Utensil Holders with Printable
- Long Beach Antique Market
- Roadside Rescue to Worktable


This is awesome! I just bought a Keurig Coffee Maker and i have a bunch of old coffee filters that I don’t use anymore. What a great way to reuse them. Thank you!
Thank YOU!!! XOXO! 🙂
MAde one last night in a fuzzy purple yarn very cool and can’t wait to make more for xmas gifts this year. great step by step instructions and pictures thanks for sharing.
I love this wreath! It’s so beautiful!
Thank you so much!
This is a great how to. Thanks!
You’re welcome! Thank you!