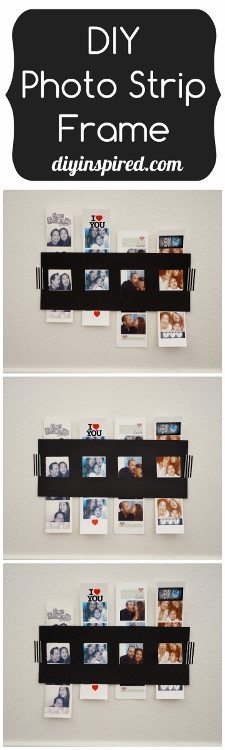
DIY Photo Strip Frame
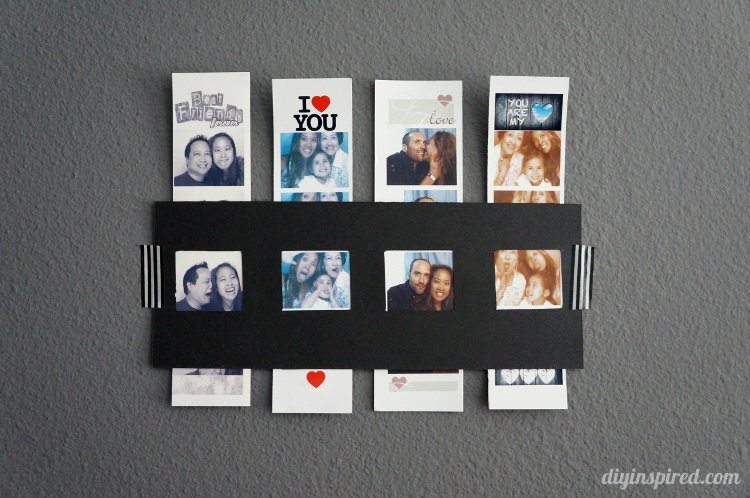
I have so many fantastic photo booth pictures. I love shifting through them every once in a while. The only problem is that they are tucked away in my closet hidden and forgotten until I happen to come across them again. I pulled out my faves and decided to make this DIY photo strip frame out of paper. A simple project that I can put up on my refrigerator to look at daily instead of yearly!
Materials:
- I Piece 8.5”X11” Cardstock
- Paper Cutter or Scissors
- Craft Knife

- Cutting Mat
- Pencil
- Ruler
- Washi Tape
- Double Sided Tape


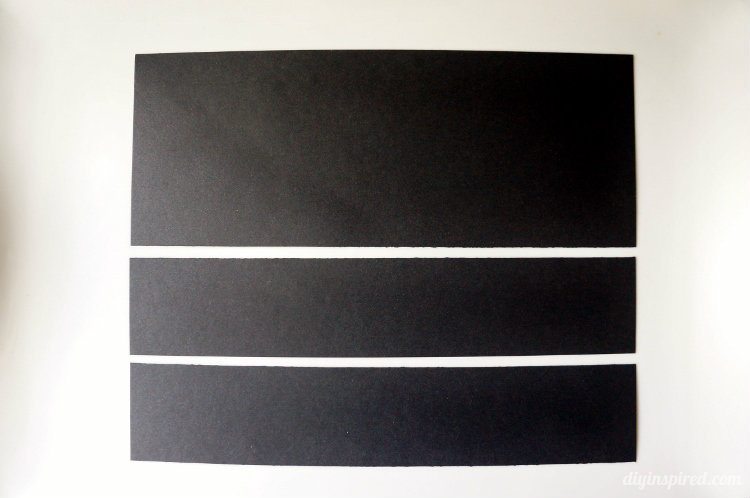
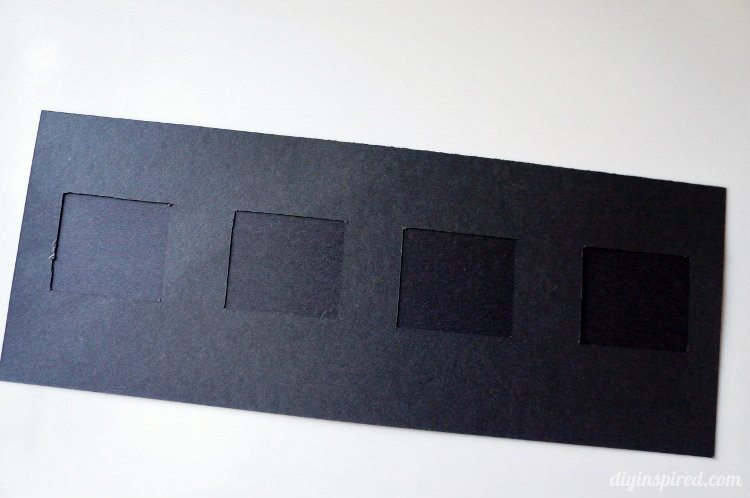
The first thing I did was cut it in half and then one side in half again. The wide piece will be the frame, one strip will be the back, and the third strip will be used to cut a template out of.
Using one of your pictures as a guide, measure and cut out a rectangular template from your third strip.

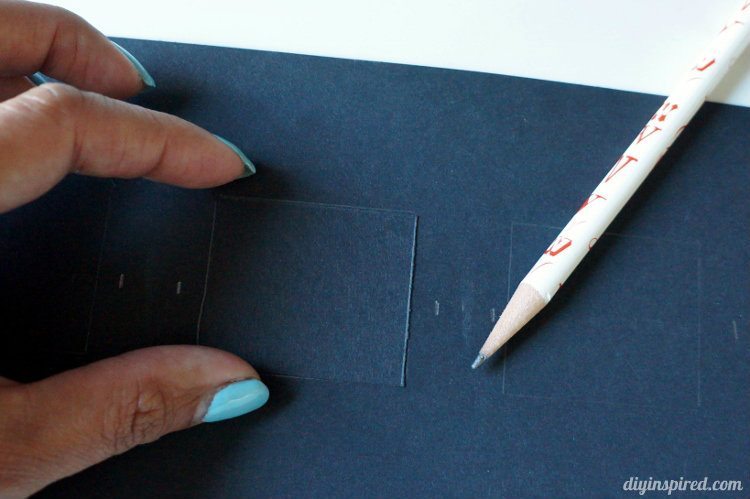
On the back of your first strip, eyeball the center and place your ruler down, measure at .25”, 2.5”, 3”, 5.25”, 5.75”, 8”, 8.5”, and 10.75”. Use your rectangular template to trace where you want the windows in between your markings.
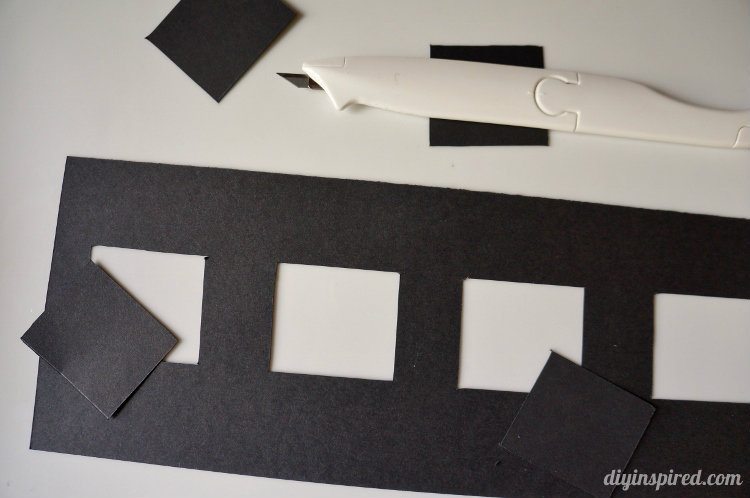
Using your ruler, craft knife, and cutting mat, cut out the frames.
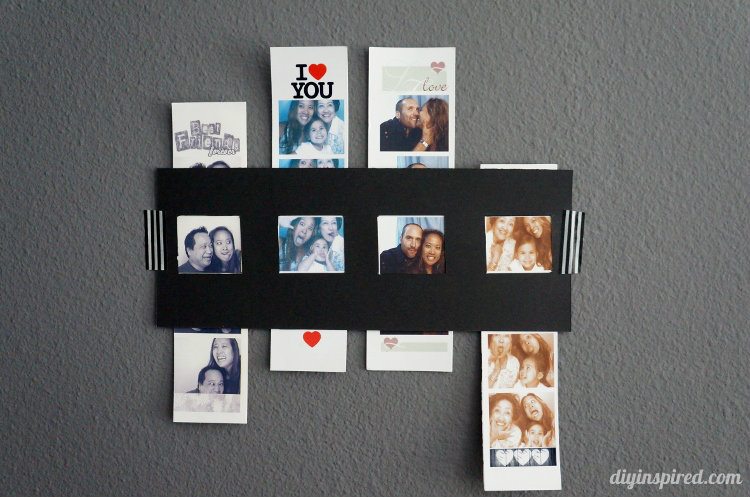
Using double sided tape to attach your second strip to the first strip, being sure to tape in between windows.
Slide in your photo strips.

You can tape it up with Washi tape and change the photos by sliding the strip up and down.

Here’s a quick short video I made demonstrating how it works! Easy Peasy!
Pin Me!