How to Make a Burlap Bow
Burlap bows are so expensive at retail stores. I am so cheap that I couldn’t bring myself to pay $12.99 for one bow. Once, I saw one for $24.00!! That is ridiculous. So, instead I decided to figure out how to make some on my own. I made two for the wreaths on my front door for six dollars with ribbon left over. I bought one roll for $9.99 and used a 40% off coupon. Here is my tutorial for how to make a burlap bow.
Time: 20 – 30 Minutes
Materials:
- Wired burlap ribbon
 (About 10 feet per bow)
 - Stapler
- Scissors
- Twine
 (About 10 feet per bow)
Instructions:
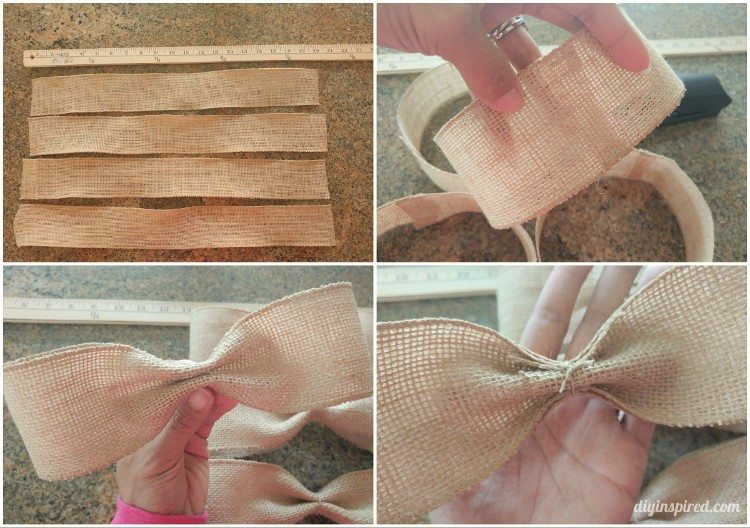
Step One: Cut four 20” strips. Staple the ends together forming a circle for all four pieces. With the opening in the center, pinch the bow in a zig zag shape and secure it with twine. Trim the twine. Repeat to make four bows.
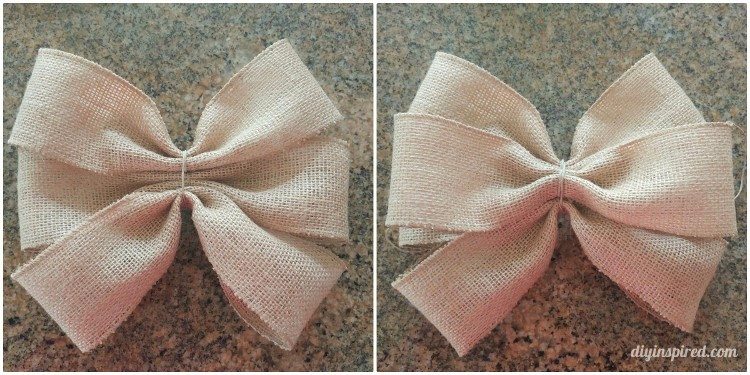
Step Two: Tie three of the bows together with twine. Lay the fourth bow on the top center and tie all four bows together with twine.
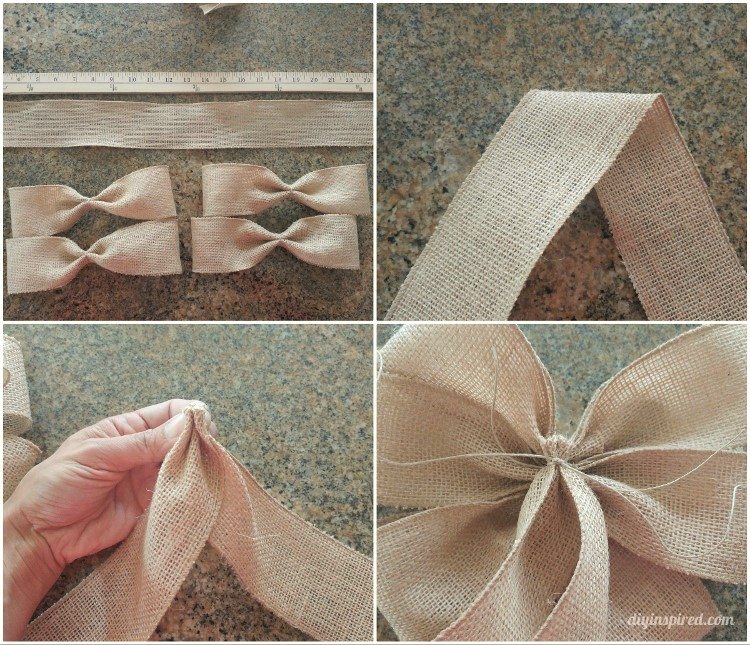
Step Three: Cut a nine inch strip and wrap it around the middle. Use twine to tie the ends together by feeding it through a small hole on each end (You can use your scissors to help make bigger holes if needed). Slightly fold the sides together to create a more narrow strip down the center of your bow.
Step Four: Cut a 24” strip. Fold it diagonally in the center as shown. Cinch the center together as shown. Secure the cinched center with twine and trim. Tie it to the back of the bow. Cut the ends diagonally for a finished look.
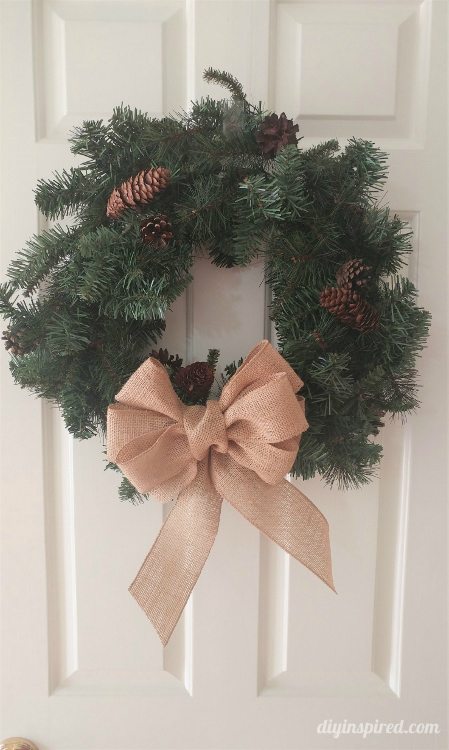
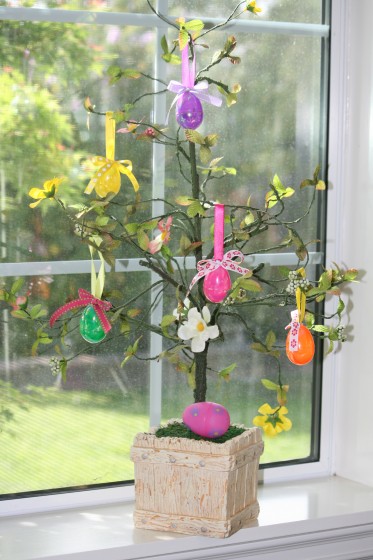
Here is the final product. You can use these burlap bows for wreaths, garland, or tree toppers. Use the same tutorial for other types of ribbon to decorate presents or even outdoor light fixtures for the holidays.

I hope you found this tutorial useful!

Great tutorial on the burlap making. Looks so easy.
I always had trouble making large bows like this and you made it very possible to make my own now. Thank You
Thanks, Colleen! Now I want to put them on everything. I think I’ll make a larger one for the end of my stair railing.
This is by far the best tutorial I’ve seen for a DIY bow! So easy to follow and it came out perfect! Thank you so much for writing this. I’ve never made a bow before and was super intimidated and on top of it, I decided to use a plain burlap and a buffalo trimmed burlap ribbon and it still turned out great!
Hi Ashley! Thank you SO much for taking the time to write this and letting me know! You made my day! 🙂
Thank you so much for this tutorial! I went through quite a few before seeing yours, and this is by the far the easiest to follow. Thanks for all the pictures and simple instructions!
Thank YOU, Mary, for taking the time to let me know. This makes me so happy! Have a wonderful day.
Thank you so much! This was such an easy tutorial that turned out a very beautiful bow in a matter of minutes. I’d love to attach a a photo of my completed project but don’t see that as an option on your site. Regardless, I’d recommend everyone try this bow!
Great! So glad it worked out for you!!!
This was a great tutorial! I can make everything else but I bomb on now making. This made it so easy for me. Thanks!!!
Thank you!