15 DIY Wedding Centerpieces that Won’t Break the Bank
Easy Budget Friendly DIY Wedding Centerpieces
Planning a wedding can not only be incredibly stressful, it can also be very expensive. There are lots of ways that you can save money and still have a fantastic day, though. One of those ways is to make your own wedding centerpieces. It doesn’t have to be super extravagant, pricey or difficult, either. There are so many great DIY wedding centerpieces that won’t break the bank that you can make.
For example, we have made some incredible Gold & Glittered Mason Jars for a centerpiece & the best part is that the jars are actually spaghetti sauce jars! You can ask your friends to hold onto their jars and quickly have enough to make beautiful centerpieces for your tables.

Use Artificial Flowers to Save Money
Since wedding dates are typically known far in advance, artificial flowers can save a lot of money. Consider choosing to mix both real and artificial together. Shop at thrift stores to find different vases and containers for your DIY flower centerpieces.
Watch the Tutorial
Watch this video on Instagram for how these mini centerpieces were made!
Tips for Finding the Right Artificial Flowers for Your Wedding
- Shop all year long to find the right colors to match your wedding.
- Walmart has a great selection on inexpensive greenery and fillers like eucalyptus leaves, lambs ear, and baby’s breath.
- Shop after season. At craft stores like Michaels and Joann, you can find after season flowers on clearance for 70% off.
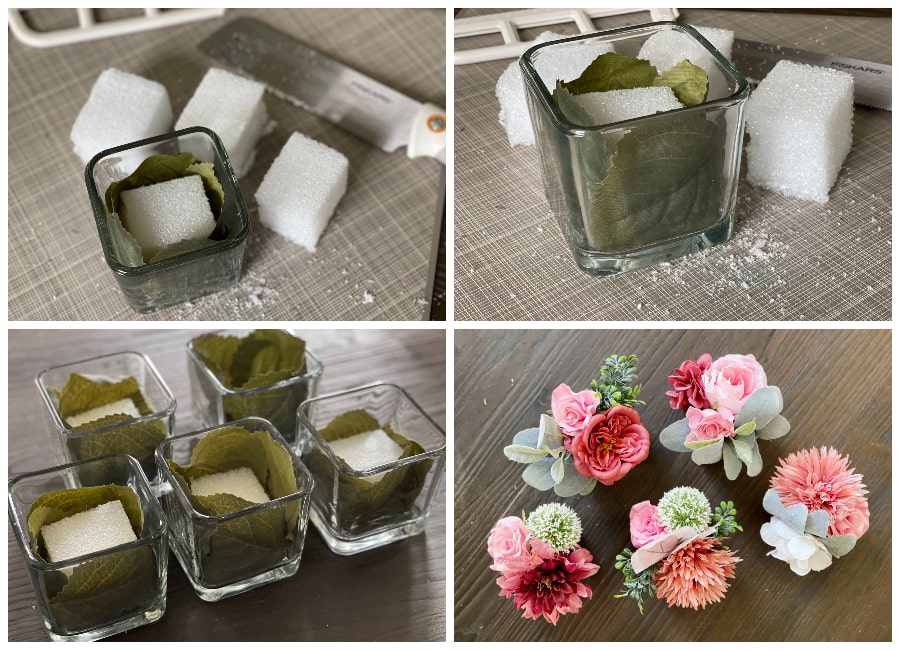
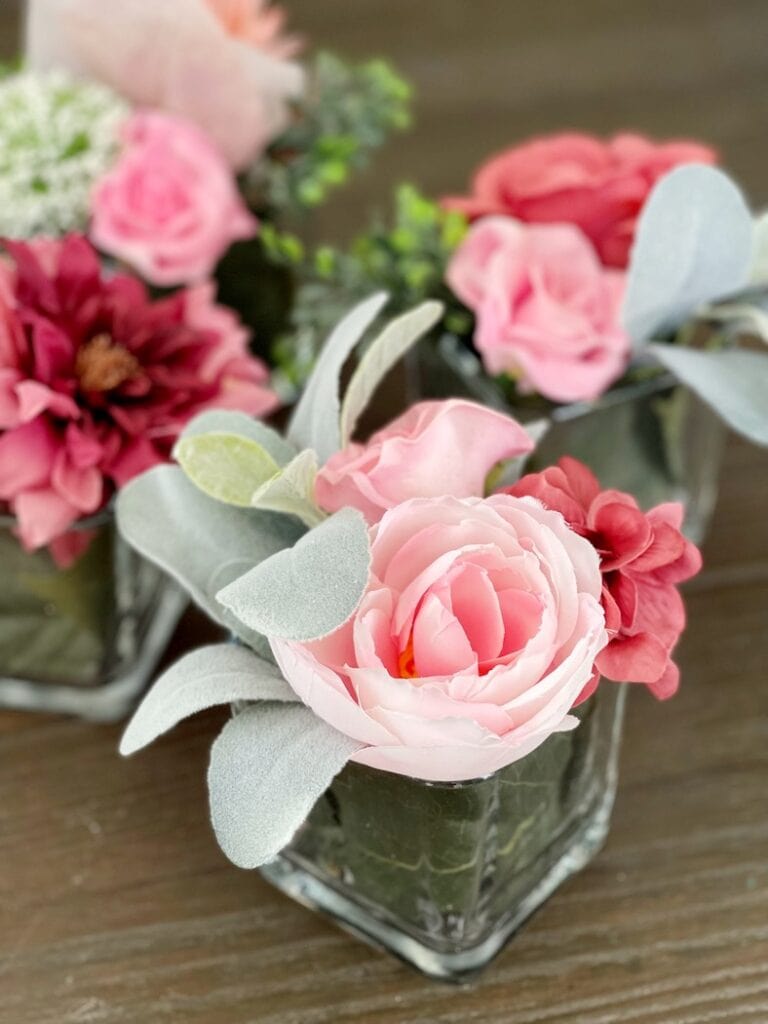
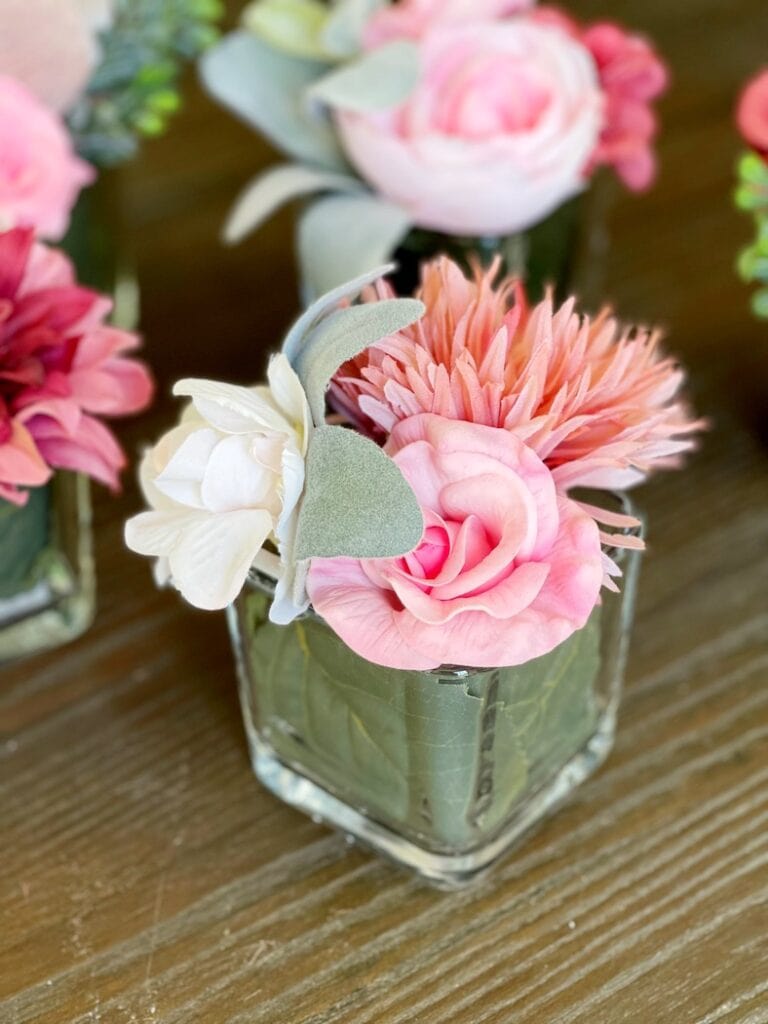
Tutorial: DIY Cocktail Table Centerpieces with Artificial Flowers
You can make these adorable mini cocktail table centerpieces by upcycling candle holders and reusing styrofoam from delivery packages.
- Cut styrofoam into pieces to fit inside the candle holder.
- Use large artificial leaves around the sides to cover the styrofoam. Make small arrangements combining flowers of different colors and textures.
- Add some greenery.
- If needed, hot glue the centerpieces to secure them together.
Other Inspiring DIY Wedding Centerpieces
- Using jars is clearly not only a cost efficient way to decorate your tables, you can use them in so many different ways, like making a Rustic Glam Wedding Centerpiece.
- Succulents are incredibly popular right now and for good reason…they are beautiful! How about using succulents and a bundt pan for a fantastic centerpiece?
- Or, if you’re having a beach or summer wedding, you can even combine succulents and shells for your centerpieces.
- Hold onto your wine bottles in the months before your wedding and ask your friends to do that same. That way you can make some beautiful Twine Wrapped Wine Bottles for your centerpieces.
- I don’t think I would ever think to use coffee filters in a wedding centerpiece but then I saw these DIY Coffee Filter Candle Holders and I have completely changed my mind!
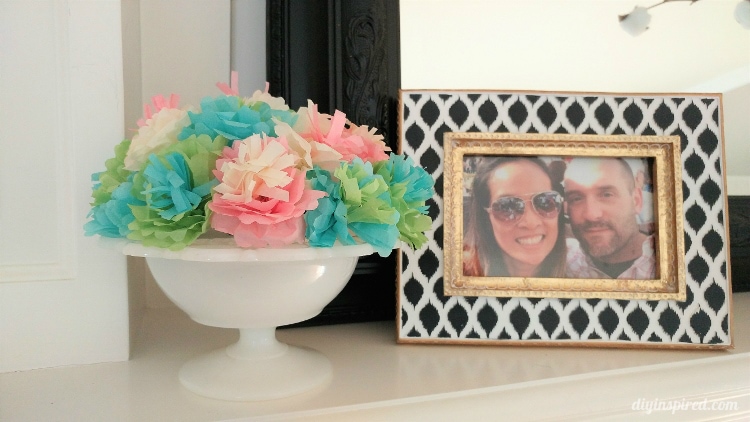
- Did you know that paper flowers can be just as beautiful (and I think even more interesting!) than real flowers?
- If you own a Silhouette, you can use it and a mason jar to create a beautiful centerpiece!
- Use books or printed paper to make Book Balls that are not only really beautiful but will have people talking about your great wedding centerpiece.
- Whenever I head into my favorite craft store, I always see a wide variety of clay flower pots in many different sizes. I wouldn’t have thought to use them as a centerpiece but with just a few other items, they are really beautiful!
- Wooden blocks can be turned into “Mr. & Mrs.” centerpieces or you can add the table number to each one.
- You can find a bag of tea light candles at your nearest dollar store and then use them to create a DIY Flower Tea Light Centerpiece.
6/15