Photo Gift Tag Sports Team Favors
Easy Photo Gift Tag Sports Team Favors
One of my general accomplishments since I started blogging is working with fabulous brands. I have been an HP Ambassador since January 2015. Every month, I submit unique photo crafts and printables with tutorials. It’s so much fun and exciting every time I see a new post that is published. This month, I am sharing these easy photo gift tag sports team favors.
Photo Gift Tag Sports Team Favors
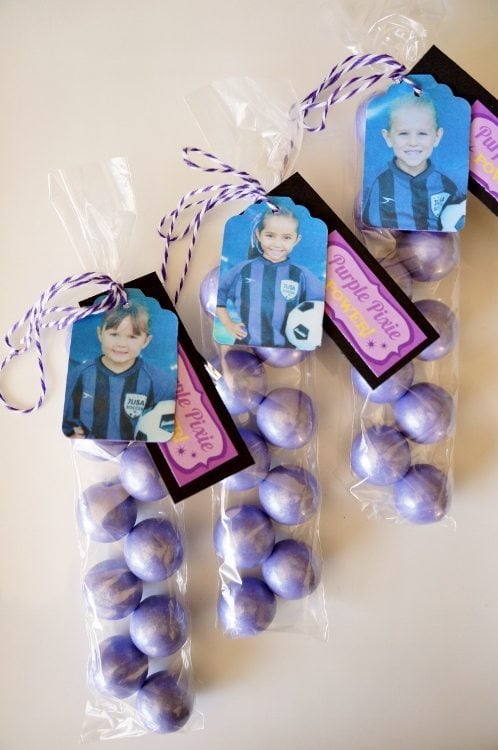
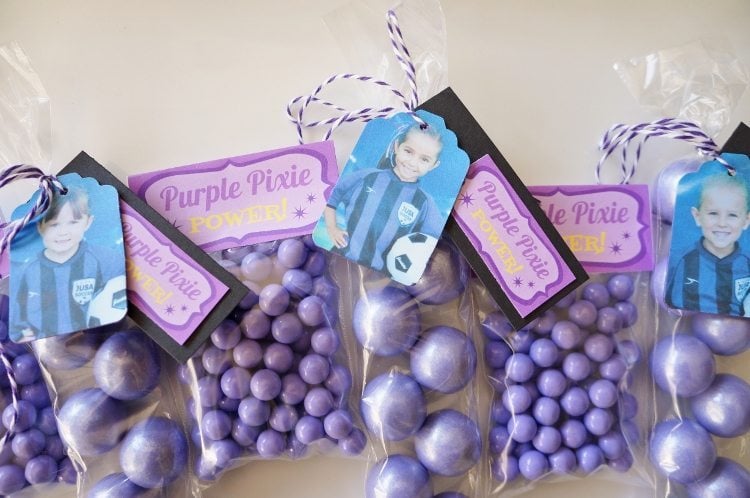
At the end of every sporting event season, there is always a party in which the team, coaches, and parents get together to give awards and recognitions and of course celebrate a successful year. Today I want to share team party favor idea using the photos of each team member. You can make these photo gift tag sports team favors in a few easy steps.
Time: 15-20 Minutes
Materials:
- Photos
- Small Plastic Gift Bags
- Candies
- Gift Tag Craft Punch
- Hole Punch
- Ribbon or Baker’s Twine
Instructions:
Step One: Fill your plastic bag with the desired goodies.
Step Two: Print a photo of each team member. I took a picture of each individual team member photo on my phone and printed it out. This way, I did not have to ask each parent for an original photo.
Step Three: Align the photo inside the gift tag punch to ensure that it is centered and punch out each photo. If your punch does not have a hole, punch a hole at the top of the tag to insert ribbon.
Step Four: If you printed on photo paper, tie the photo tag to your party favor. If you printed on regular paper, be sure to line the back of your tag with cardstock to make the tag sturdy. I also designed and printed tags with the team name on it and added it behind the picture.
You can use these photo tags for any team party favor or even for holiday and special occasion gift giving.
These tags are easy to make and a great way to personalize a small gift. Here is a quick YouTube video I made of this simple photo project:
Thanks so much for stopping by! In case you missed them, here are some of my other HP photo projects, printables, and videos:
- Joke of the Day Lunch Box Notes
- DIY Instagram Photo Holder
- Photo Collage Frame DIY
- DIY Photo Clothespins
- Mini Photo Memory Frame