Moen: How to Install a Kitchen Faucet
This post brought to you by Moen, Incorporated. All opinions are 100% mine.
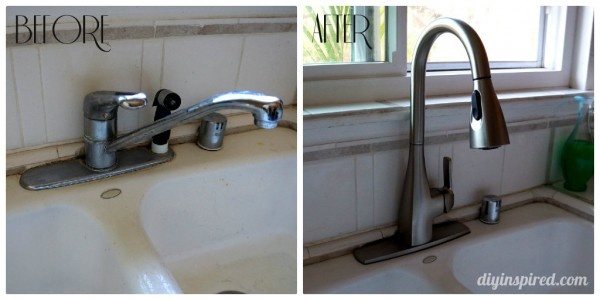
One of my best friends has lived in her home for many years. Her husband was born and raised in that home. Over the years they have been able to make some big improvements like new floors, windows, and kitchen cabinets. Now, they are able to focus on the details that truly make their house a home. Last weekend I helped them install a new Kiran Spot Resist one-handle pulldown kitchen faucet. Oh my! What a difference a faucet makes! Here is our journey on how to install a kitchen faucet.
The Moen Kiran faucet can be purchased at Lowe’s. It has so many great features and was perfect for updating their kitchen. The Spot Resist™ stainless finish resists fingerprints and water spots for a cleaner looking kitchen. It has a high arch pulldown design makes it easy to adjust water flow or temperature. It is equipped with the Reflex™ system for smooth operation, easy movement of the spray head.
Installation time: Approximately one hour
Materials:
- Adjustable Wrenches
- Screwdriver
- Pliers
- Flashlight
- Plumbers putty
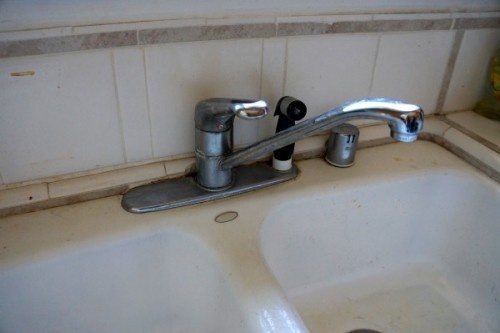
Here is a photo of the sink before. It is quite old!
Step One:
Shut off the water valve. In our case, the valve was located below the sink. I turned the faucet to release any extra pressure.
Step Two:
Disconnect the mounting and remove the old faucet and clean the area from any dirt and debris. As you can see, this was a REALLY old sink! Yuck!
Step Three:
Assemble the mounting washer to the faucet and put the supply lines through the hole. Make sure the faucet sets securely on the deck. Be aware of your surrounds so that you don’t scratch your new faucet!
Step Four:
Reconnect the supply lines.
Note: At this point I had to run to Lowe’s to purchase an adapter because their faucet was so old! Apparently, old tube lines are 1/2 inch, while newer lines are 3/4 inch.
Step Five:
Insert the hose through the spout of the faucet and attach the connector on both sides. Make sure there is a clear path for the retractable hose.
Step Six:
Attach the faucet head to the hose by screwing it on.
Step Seven:
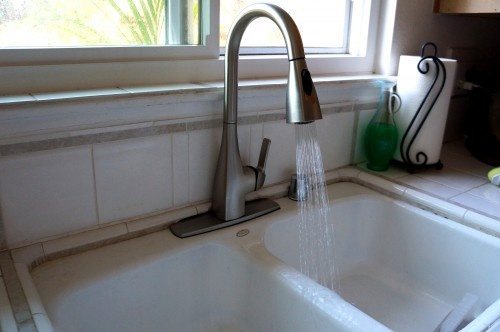
Attach the hose weight to the hose in the bottom of the sink and test the water pressure.
Ta dah! What a difference!
Learning how to replace a kitchen faucet was a lot easier than I thought! The step by step photos made it easy to understand and follow. My friend and her husband are so happy with their Moen Kiran faucet. Join me and become a Moen fan on Facebook!


2 Comments