Mid Century Modern DIY Dog House Build
The Details of the DIY Dog House I made for GMC
I have been working with GMC for a few years now. They are one of my favorite partnerships I have and was excted to take on this DIY dog house project. In the past few years because of this special relationship, I have:
- Lead a team on a DIY Challenge Show
- Appeared on Good Day LA
- Appeared on KTLA5 Morning News
- Worked with MomsLA
- Worked with Habitat for Humanity
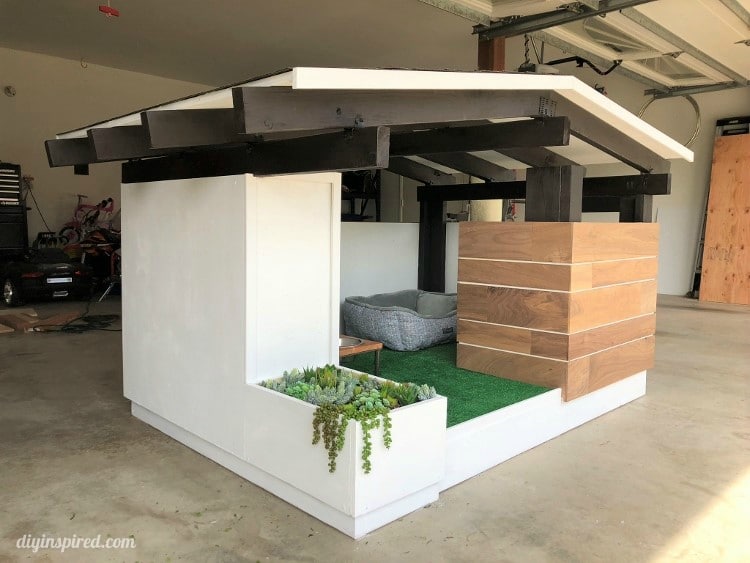
Most recently, I completed a Mid Century Modern DIY dog house build that GMC needs for an event this month. I have to say, this is probably the best and most fun DIY project I have ever done.
Watch the Process
This project started with an inspiration picture they provided me of another dog house from Pijuan Design Workshop. Don’t want to make this yourself? Check out their beautiful mid-century modern dog houses.
I enlisted my good friend Maily to help me with it for a few reasons: 1) I trust in her creativity and skill, 2) we work well together, and 3) building something like this is just more fun than doing it alone.
Based on our inspiration photo, we measured and started working on the structure. GMC wanted the dog house to be large enough to fit two or three dogs. We chose to go with pine wood because it’s durable and ideal for an outdoor dog house.
Structure
Tools & Materials Used:
- 2 X 4 Pine
- Pine Plywood
- Post Caps
- Wood Screws
- Miter Saw
- Nail Gun and Nails
- Pocket Hole Jig
- Paint and Stain
We chose pine 2 X 4’s and pine plywood as well. Based on our inspiration house, we figured out the measurements and basic structure of the house. Once the structure was built we added the frame of the roof.
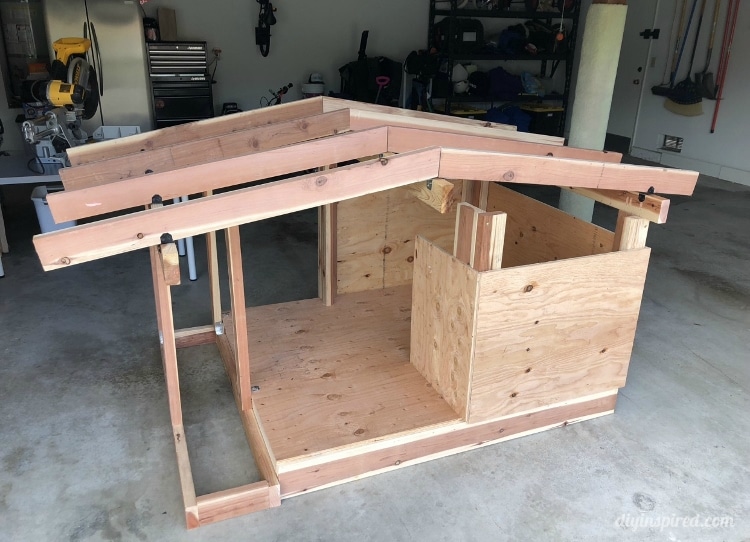
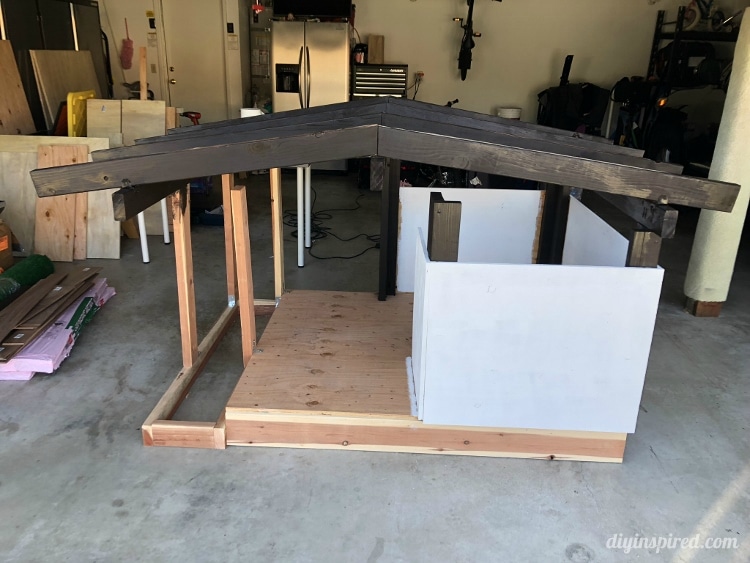
We ended up going with an eight-degree angle cut to follow the mid-century modern design. I decided to stain the wood a dark ebony and paint the walls white for a clean modern look.
Laying Artificial Grass
Tools and Materials Used:
- Artificial Grass
- Titanium Scissors
- Measuring Tape
- Liquid Glue
Cutting and laying artificial grass for the inside was a little challenging because my knife didn’t cut well. I ended up using a pair of titanium scissors. First, I measured the entire floor hoping to use one seamless piece. Then I cut the corners as I went. I ended up having to cut a second piece because it was off about two inches after cutting. Since I was short only 2 inches, I moved the seam to the center of the dog house instead.
When I talked to a guy at Home Depot he suggested I use industrial double-sided tape to lay the floors. You can find this in the paint section. I tried this, and it didn’t work. So, I went back and decided on liquid glue which worked very well.
Nailing in the Trim
Tools and Materials Used:
- Walnut Wood Boards
- Nail Gun and Nails
- Miter Saw
- Hammer
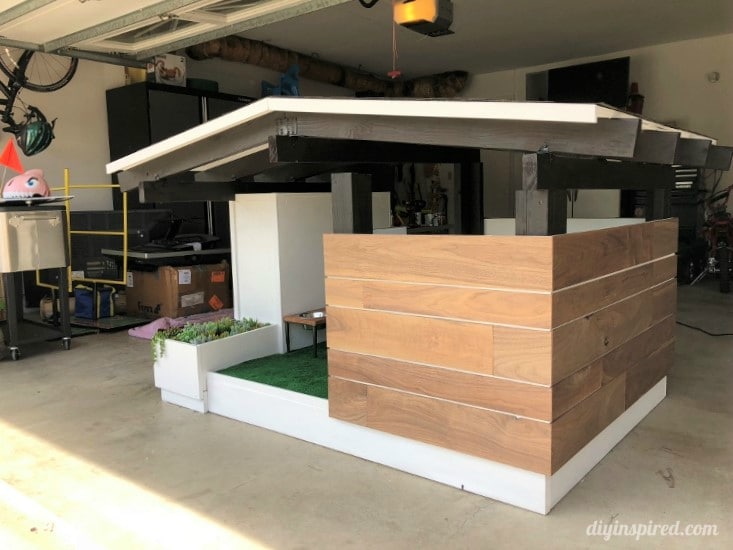
Next, we chose to use high end walnut wood boards that were treated for the outside.
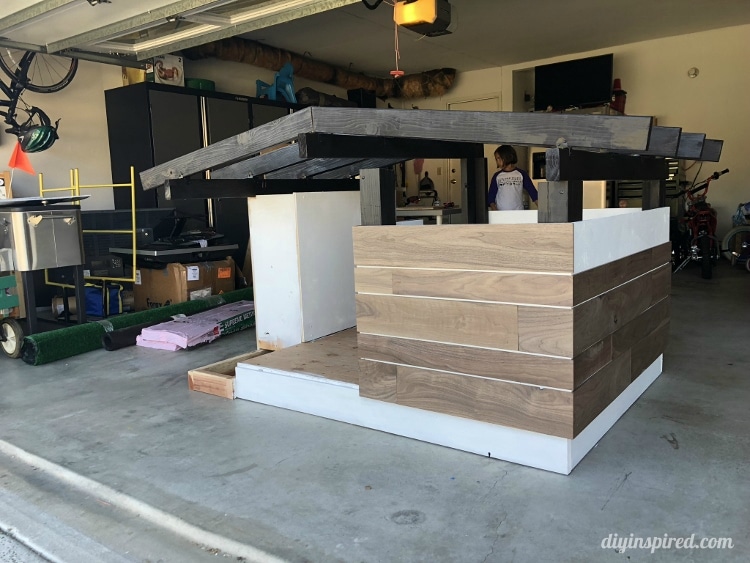
We really splurged on these. The wide boards were about $17 a piece and the thinner boards were $11 a piece! Yikes…but so worth it in the end. Starting from the top, our pattern was wide, thin, wide, thin, wide.
We used a nail gun for the studs and then had to hammer in nail brads for the rest because of the thickness of the plywood walls.
Artificial Succulent Garden
Tools and Materials Used:
- Miter Saw
- Plywood Scraps
- Nail Gun
- Stain
- Moss
- Arrificial Succulents
- Glue
- Molding
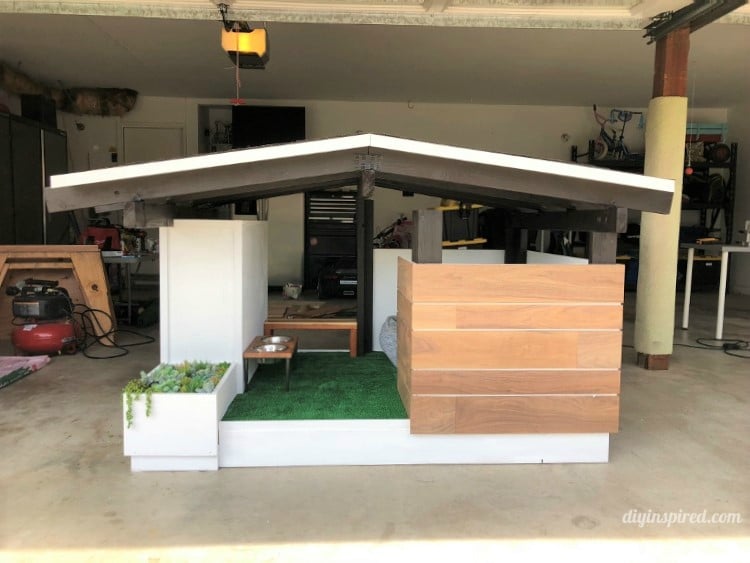
I wanted to add an artificial succulent garden, so we built a planter box on the side.
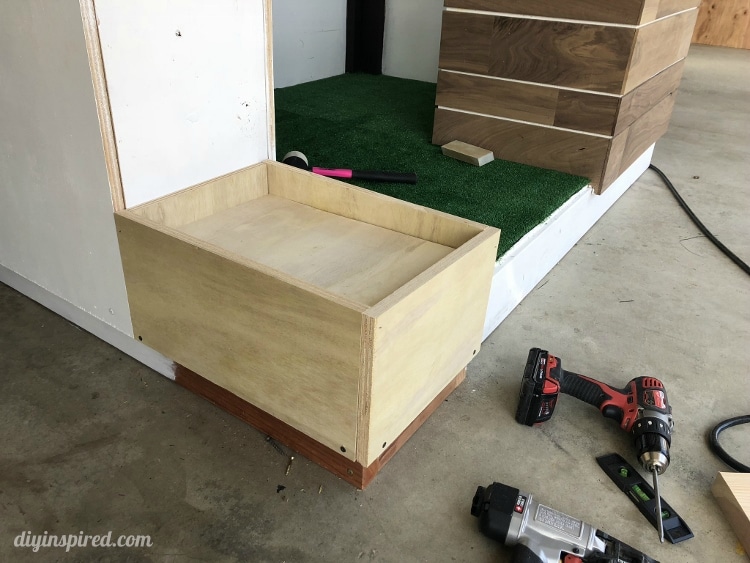
Next, I painted it to match the house and stained the inside of it to look like dirt. Lastly, I covered it in moss, and glued in artificial succulents I purchased from Amazon.
To give that side of the house a finished look, we added white molding for the trim. Maily also made a little bench for the inside and I coated it with polyurethane.
Adding the Roof
Tools and Materials Used:
- Exterior Grade Plywood
- Roofing Paper
- Scissors
- Roof Shingles
- Nail Gun and Nails
Our last thing was to add the roof. I painted the inside (ceiling) white before we put the roof on and measured and had thick exterior grade plywood cut at Home Depot. I believe it was cedar. This was also splurged on this because I figured that the roof would hold the entire structure together. Layering the top with roofing paper, I then used shingled light brown tiles for the roof. White trim along the roof pulled the whole look together.
DIY Dog house final measurements:
- Roof – 69” x 50”
- Base – 88” x 54”
- Height – 48.5”
For final touches, I went through and re-stained some parts and touched up the white paint throughout the entire dog house.
This DIY dog house project is probably my most favorite of all time.

VERY COOL DOG HOUSE!!! BUT WHERE IS THE DOG???
Thanks Barb! Ha! I was hired to build this for a dog event. So, unfortunately it was picked up after I built it and I didn’t get to see the dog use it! 🙁
Nice dog house! Very creative. I’m sure your dog loves it.
Do you know the measurements of the dog house??
Hi David. I didn’t make plans for the dog house, but if this helps here are the measurements for the final product:
The roof is 69” x 50”
The base is 88” x 54”
The height is 48.5”
Great Blog! Your dog lives a life of luxury, it looks incredible. Keep posting the great content! Jamie.
I love this project
How much do you think you spent on it ?
Hi there! I actually splurged on this project because it was for a client. For example, I used real Walnut panels, which were about $11 a piece (yikes!). I also splurged on the type of artificial grass and roofing materials, so it was a little over $1500 to make it. You can make it for much cheaper, depending on the materials you choose.
That’s what my carpenter guy told me, at least 1300 in material 🙂 congrats, you did great! Simply love it!!
How did you attach the frame to the base?
I used a Kreg pocket hole jig.
Hi! Where did you find the rafter ties for the beams? I’m having a hard time finding that size
Home Depot in the outdoor patio section by the lumber!
Hello. Do you have the cuts for each item
Hi Jose! Unfortunately I “winged” this one as I went. So sorry!
Hi! Where did you get your blueprint from? If you bought it please tell me where!
Hi there! I didn’t use any plans. I honestly “winged” this one!
How did you make the little secluded part of the house? Like how did you attach those vertical beams to the deck? I didn’t see any hardware. Did you screw them from underneath?
Hi Lani! I made pocket holes with Kreg Jig and screwed them into the supports I made on underneath the platform. The walls are just plywood I nailed to the beams.
Can you pls specify all the sizes of wood and everything you used to make this project. I want to make this with my grand father. What did you use for the roof thrushes? Pine, treated wood. And what you used in size in wood and for the columns. Pls be super specific. Thank you.
If I wanted to make a much smaller version for a bunny would you suggest using something smaller than a 2×4?
I say, “it depends”! The size is totally up to you.
I made one for my cat and drew on design inspiration from Pijuan Designs and Dinah. With it being for a cat I decided to stick with 2×3’s and I downsized to 24” deep x 36” wide and 18” tall. That’s approximately half the size in scale. It worked out perfectly. Materials costs totaled less than $250. And to top it all off, I was able to tie it into her existing DIY cat tower made from cardboard concrete forming tubes wrapped in spare carpet remnants from when my home was built many years ago. Good luck. If I can be of assistance by answering questions or similar, please do ask.
Now if Dinah would tell us what GMC stands for, I think all our questions would be answered… 😉
That is fantastic!!! I’d love to see it! GMC stands for General Motors Co. It’s the company that makes Chevrolet, Buick, and Cadillac automobiles. You have taught me not to assume! Ha!
Thanks Dinah! I wasn’t sure if it was a DIY network or group, but I’m definitely familiar with General Motors. Congrats to you on your many successes and achievements. It’s proof that hard work, ingenuity, and personality can take you places and are not common virtues. I’m loving your site, keep up the good work and great ideas. Not sure of the best way to share some photos but I’d be glad to.
Very Best,
Trae
Thanks so much, Trae! Feel free to email them to me at dwulf@diyinspired.com. I’d love to share your work!
Hello I would love to make this myself what do you think what the hardest part was
Hi Liz! So excited for you! I wouldn’t say it there were any “hard” parts. If anything, we just tried to figure it out as we went along. In hindsight, I wish I would have written down step-by-step how we did it so that others could follow along to make it themselves.
If I build this I would like it to be inside, how could I take this inside? What are some cheaper alternatives instead of spending 1500 dollars?
What type of bracket did you use to hold the roof wood in place?
Hi Christy, I don’t know the name but I found them in the outdoor (patio/gazebo) hardware section.
Hi! Is my son able to get the plans for this cute dog house? We love love it. He needs a cool project to make in wood-shop 🙏.
Hi there! I wish I had the skills to make plans. Honestly, this was one of the first “big” builds I’ve done and I really just winged it; figuring it out as I went along! So sorry I can’t be more helpful!