DIY Coat Rack Photo Ledge
How to Make a Multifunctional DIY Coat Rack Photo Ledge
Hi there, everyone! My name is Laci from LaciJane.com and I’m partnering with Dinah with DIY Inspired on another DIY project post, DIY Coat Rack Photo Ledge! Returning followers will have already seen some of my other posts on here, but if you’re new here, this will be my fourth post on this blog. In case you missed them, check out my Repurposed Jewelry Holder, Easy DIY Shoe Storage Idea, and my Dollar Tree Mirror DIY. As always, I’m excited to share another DIY project with you and thank you for partnering with me again, Dinah!

The post that I’m sharing today goes along with the others because this was a DIY project for my entry as well. If you’ve read the other posts, you’ll know that a couple years ago, I challenged myself to decorate my back foyer on a very little budget. I’m talking under $50-cheap. I knew I was going to have to get creative if I wanted to meet that goal. I made a DIY Shoe Storage, a DIY Pottery-Barn Inspired mirror, and a DIY Coat Rack Photo Ledge.
Multi-Functional Furniture
If you didn’t already know, I love multi-functional furniture, especially in small spaces. Our foyer is small, and I knew the $50 budget wasn’t unrealistic, especially since I would be making most of the items myself.
I remember when I first got into woodworking several years ago, I was so intimidated to make a shelf. I thought it would be hard, time consuming, and I thought that I needed a lot of fancy tools, all of which are untrue. Since then, I have made several shelves and I will never buy a shelf again.
Watch the Video Tutorial
DIY Coat Rack Photo Ledge Instructions
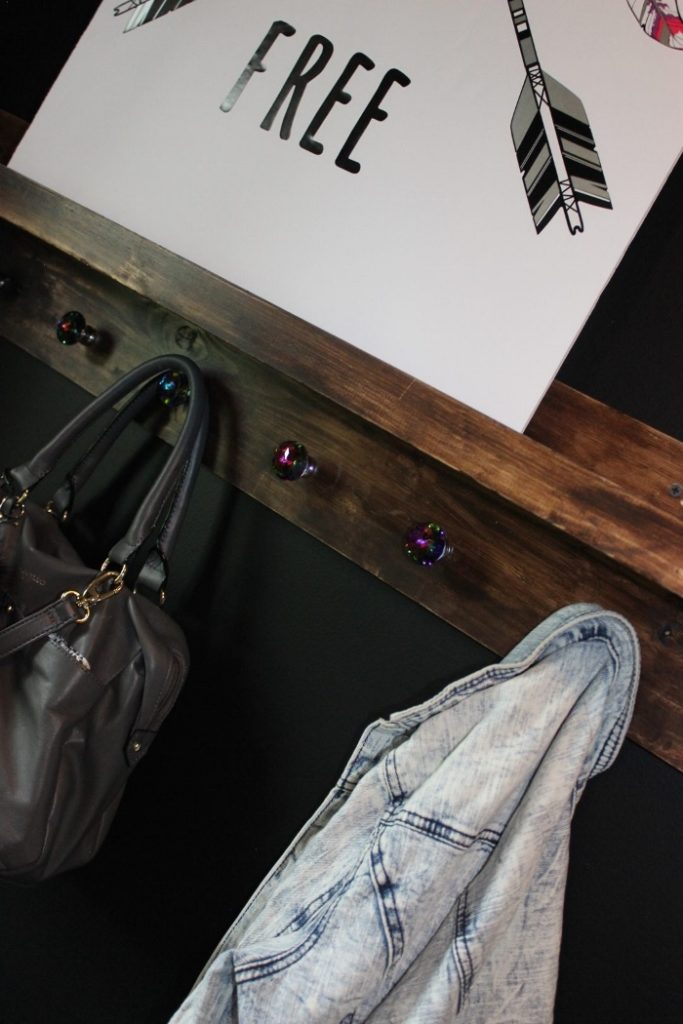
This photo ledge is special to me because it’s the first shelf I’ve ever made. I was redoing my foyer as mentioned earlier, and I wanted to add artwork, but I needed a place to hang up my purse, my daughters backpack, and our jackets; so, this was the perfect solution for our small back foyer.
I love how it turned out. It looks like something I would buy at the store, but it was so inexpensive to make. Let me show you how to make this DIY Coat Rack Photo Ledge.
MATERIALS
This materials list contains affiliate links to recommended products.
- 1x8x6′ long
- 1x4x4′ long
- 1x2x4′ long
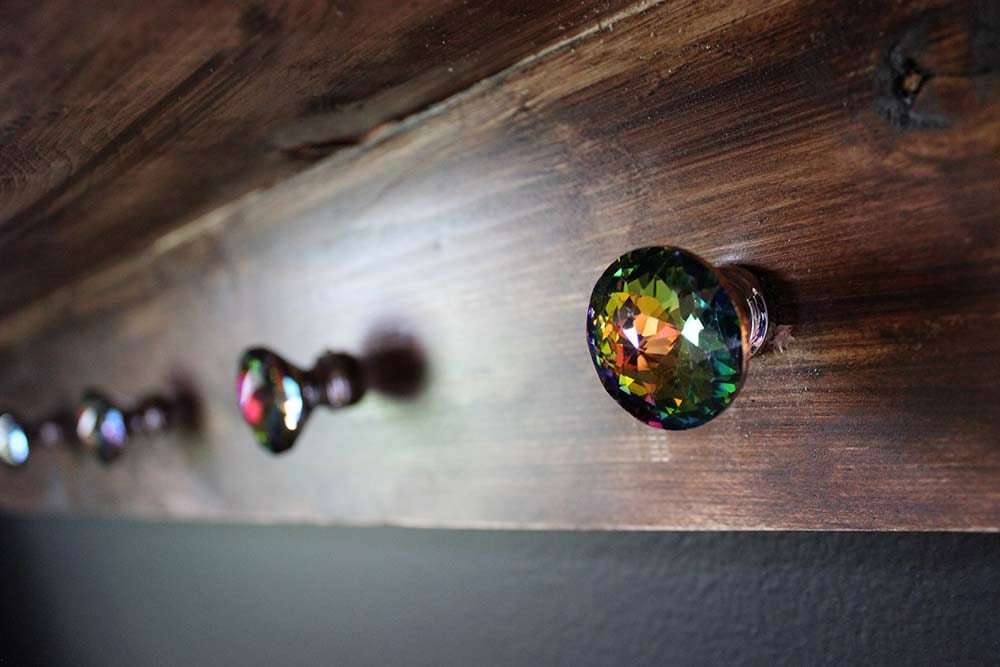
- Rainbow Crystal Knobs(I’m obsessed with these knobs. They are so beautiful. I’ve used them in a lot of my other DIY’s because I can’t get enough of them!)
- 9/64 drill bit
- Drill Gun
- Titebond Wood Glue
- 1 1/2 in. screws
- Drywall Anchors
- T-square
- Speed Square
- Tape Measure
- Screwdriver
- Level
DIRECTIONS
- Cut all your wood the same length. I cut mine to 40″ and measure and mark where you want your shelf to go on the 1×8 using your T-square.
- Glue your 1×4 on the line you marked. Use wood clamps to clamp it down into place and allow it to dry. Wipe off excess glue. Make sure the shelf is straight using your level.
- While the glue is drying, measure and mark where you want your knobs to go
- Using 9/64 drill bit, drill your pilot holes. Drill your pilot holes into the back of your 1×8 into your shelf (1×4). Drill your screws through the pilot holes you created in the back of your 1×8 and into your 1×4. Ensure it is level.
- Glue your 1×2 onto your shelf (1×4). Ensure it is level.
- Clamp it into place making sure the bottom of the 1×2 is even with your shelf. Allow it to dry.
- Sand your wood ensuring you get off all the wood glue and stain or paint your wood.
- Screw your knobs into the wood and screw it up on the wall.
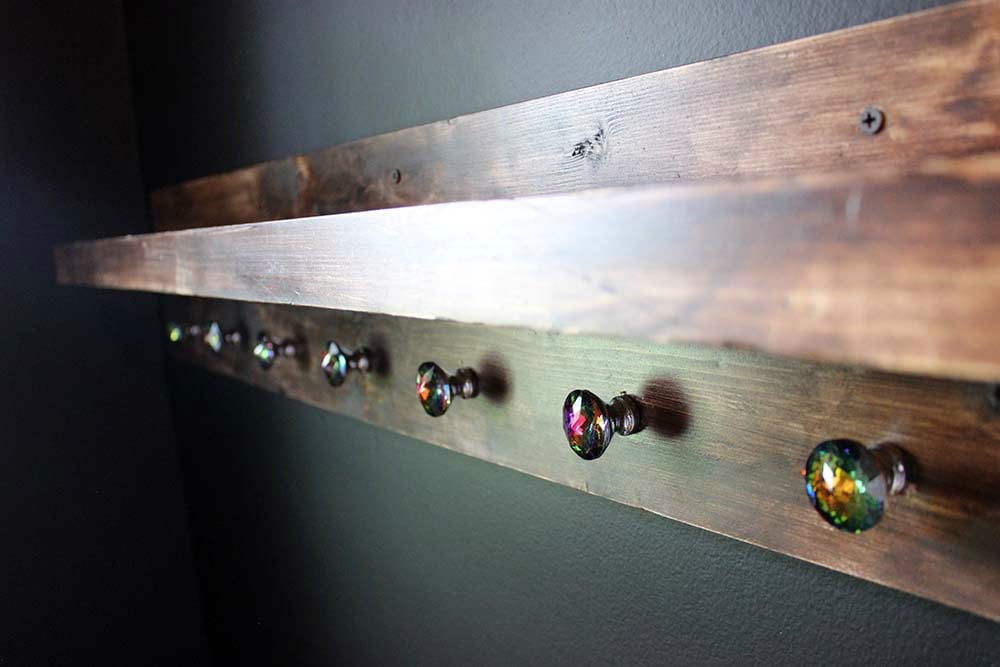
And you’re done! So, what are your thoughts on my DIY coat rack photo ledge? I hope that you found this tutorial to be easy, inspirational, and the motivation you needed to create something today. Thanks for having me!