DIY Mini Tissue Paper Flowers Bouquet
How to Make a DIY Mini Tissue Paper Flowers Bouquet for Your Home Decor
It’s almost spring! If you read this blog, you’ll find that I enjoy making paper flowers. Most recently I made paper hyacinth flowers and a four-leaf clover patch for St. Patrick’s Day. Today, I want to share how to make a DIY bouquet using mini tissue paper flowers.
Time: 30 Minutes – one hour
Materials:
- Tissue Paper

- Ruler
- Pencil
- Scissors
- Twine or String
- Glue
- Styrofoam or Floral Foam
- Floral Wire Stems
- Container


Watch the video tutorial:
Instructions:
Making Mini Tissue Paper Flowers/Pompoms
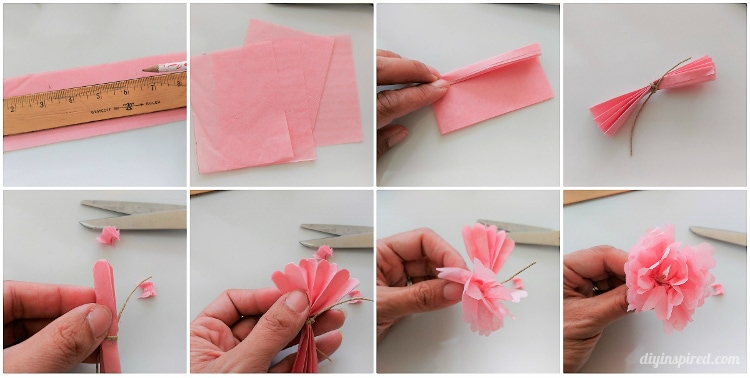
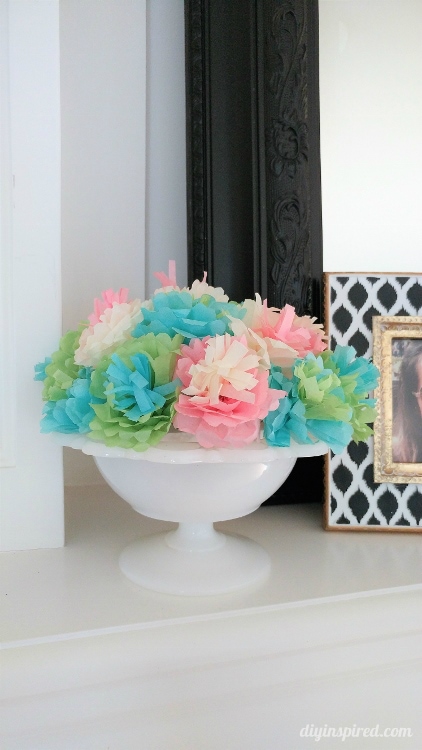
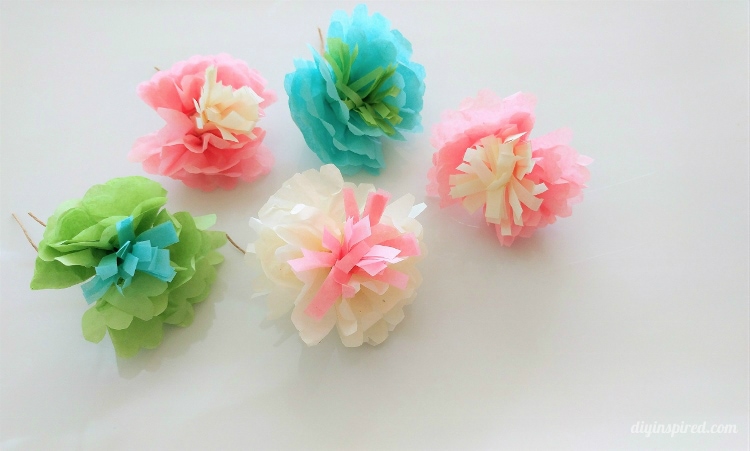
Using a pencil and ruler, measure 2.5” X 3.25” rectangles. You will need four per flower. Fold over the tissue paper so that you can cut several at a time. Layer four pieces on top of one another. Lengthwise, fold the layered pieces in an accordion fold. Tie the folded tissue paper in the middle with string or twine tightly. Fan out both ends and gently separate the layers of tissue paper one by one. Fluff the flower so that the layers go up in one direction.
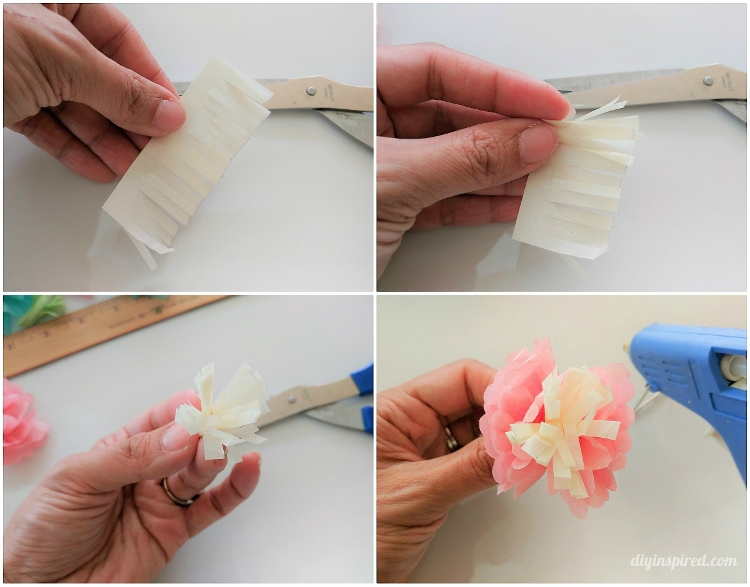
Next, use another rectangle in a contrasting color and fold it in half lengthwise. Fringe the paper on the unfolded side. Roll it to form the center of the flower. Glue it to the center of the tissue paper pompom. Trim the excess string if necessary.
Creating a Bouquet
Cut 3”-4” pieces of floral wire stems. Glue a stem to the bottom center of each flower. I used hot glue (instead of white glue) to speed up the process. Place foam inside the desired vessel and arrange your bouquet!
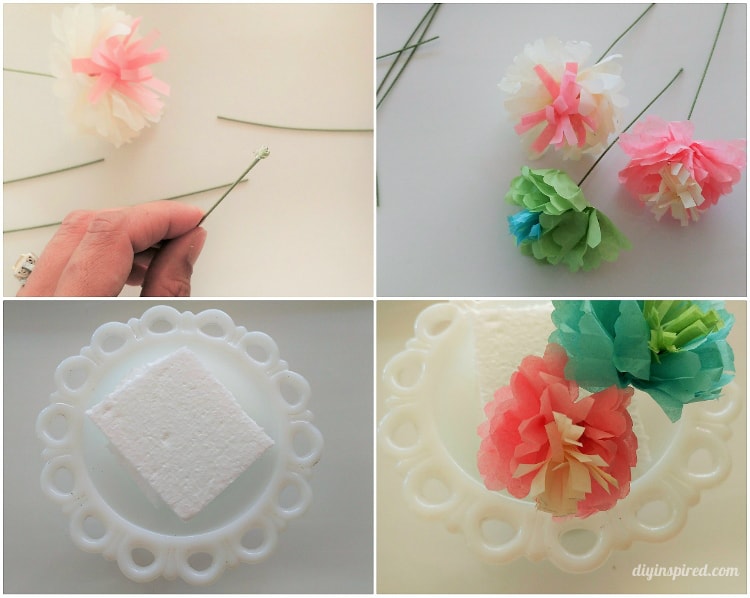
This is perfect for Easter or spring décor. You can also use the flowers to embellish gift wrapping or for party decorations. Play with colored and patterned tissue paper to fit your décor or party theme.
Like it? Pin it!