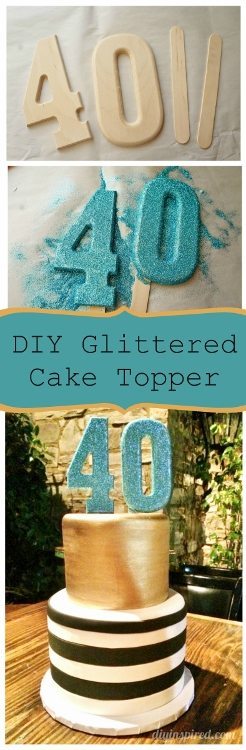
DIY Glittered Number Cake Topper
One of my best girlfriends tuned 40 this year. We made decorations and centerpieces for her party and ordered a cake. I looked around for the perfect cake topper for her but couldn’t find what I was looking for, so I had to make it. I knew I wanted large glittered numbers, so I hit the craft store. Here’s how I made this DIY glittered number cake topper.
Time: 15-20 Minutes (without drying time)
Materials:
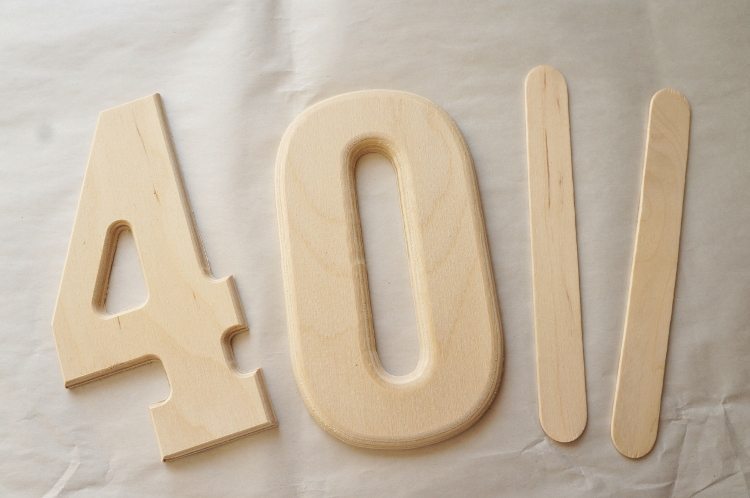
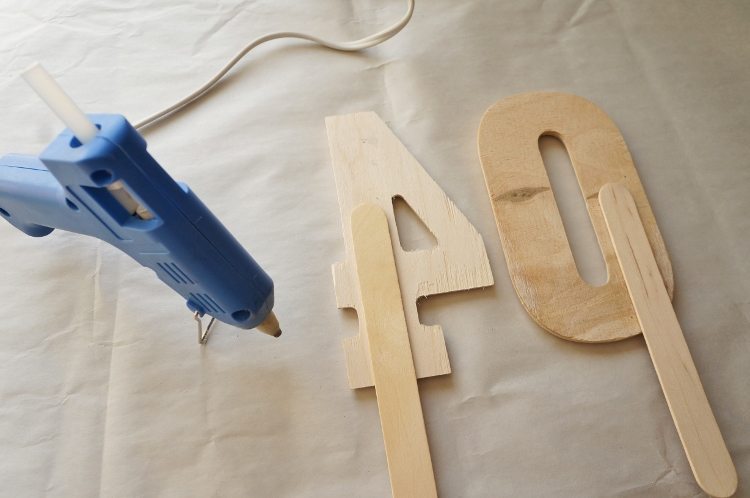
- 5 inch Wood Numbers
- Crafts Sticks
 (one per number)
 - Hot Glue and Glue Gun
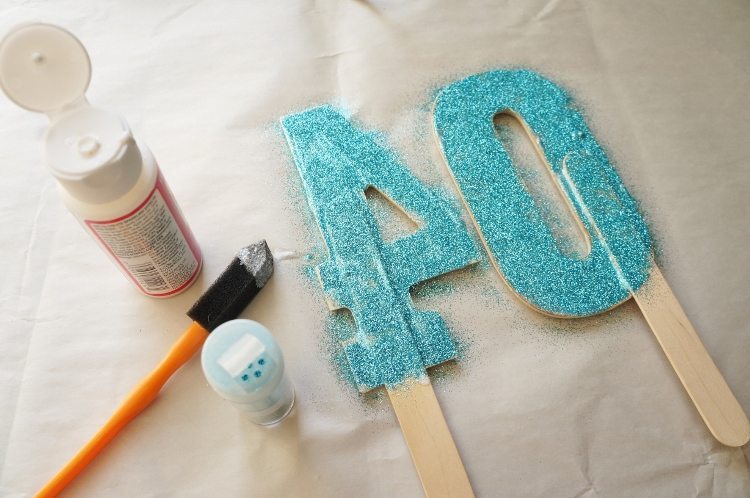
- Glue
- Glitter
- Scarp Newspaper or Paper
- Clear Glaze
 (one per number)
We wanted it to be big and sparkly so I found 5” pre-cut unfinished wooden numbers at Hobby Lobby, which were the perfect size.
The first thing I did was glue the craft sticks to the back of the numbers.
I glittered both the front and back, allowing each side to dry completely.

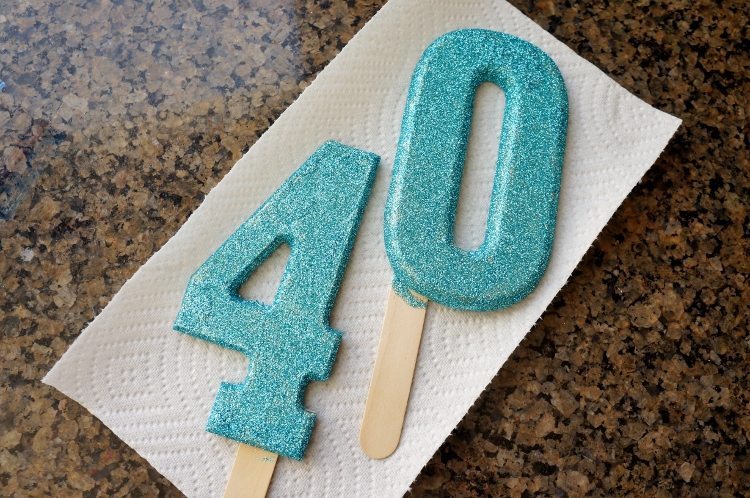
Lastly, when the numbers are dry, spray clear glaze on top to prevent the glitter from falling all over the cake. I recommend, Krylon’s Clear Glaze in an aerosol can. Be sure to spray outside in a well ventilated area.
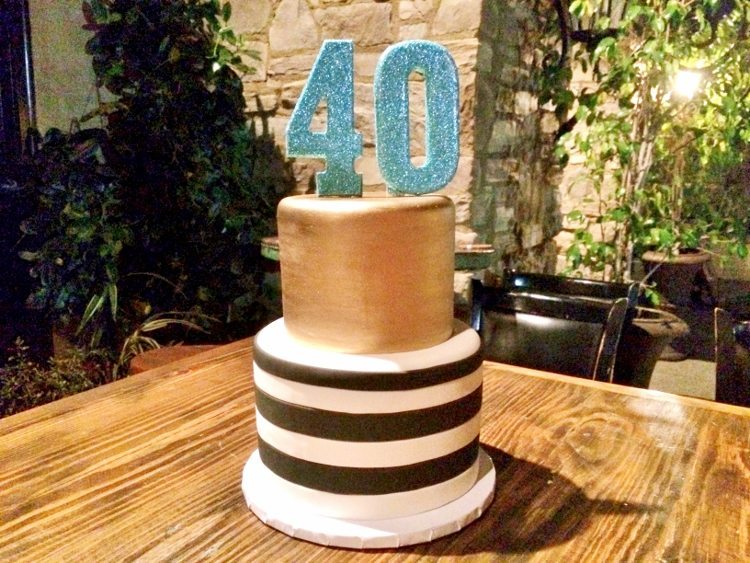
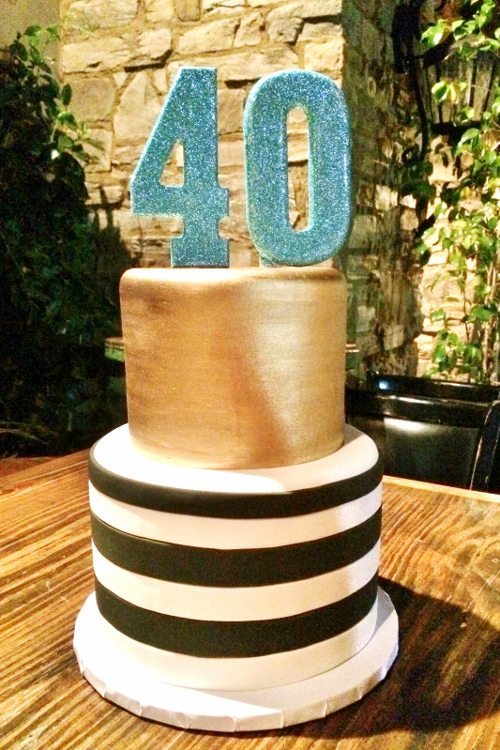
We had a beautiful 2 tiered round cake made at Rockwell’s Bakery. The first layer was black and white stripes, and the top layer was gold. The numbers were teal, the birthday girl’s favorite color. It was perfect!
You May Also Like:
- Three Simple DIY Dinner Party Ideas
- Butterfly Birthday Party Invitation in a Box
- Last Minute Birthday Surprise Idea
- Recycled Map DIY Birthday Banner