DIY Pug Bookmark
Tomorrow is my daughter’s last day of first grade. Waaahhhh!!! I can’t believe it! She came home the other day and said she needed me to make a pug bookmark for her friends. What? I have no idea why and she didn’t go into detail, but all I knew is that I would of course come up with something. So here is how I figured out how to make this adorable little pug bookmark.
Time: 15 Minutes
Note: You can play around with the sizes of circle craft punches. The ones noted here are what I used, but other variations will work.
Materials:
- Brown Paper
- White Paper
- Black Paper
- Pink Paper
- 3.5” Circle Craft Punch

- 1.5” Circle Craft Punch
- 1” Circle Craft Punch
- Heart Craft Punch
- Glue
- Scissors


Watch it on YouTube:
Instructions:
I used construction paper for this craft but to make it sturdier, I would use card stock instead. This would be a fun classroom craft or perfect for a summer craft to encourage reading while on vacation.
Here is a photo of the sizes I used:
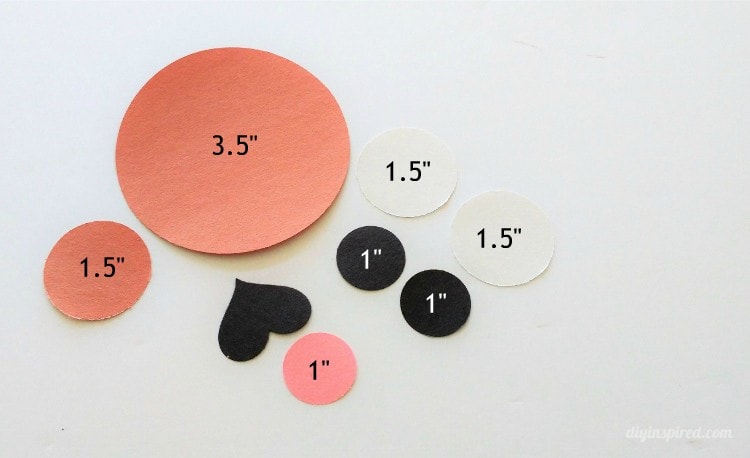
You need:
- 1 – Brown 3.5” Circle
- 1 – Brown 1.5” Circle
- 2 – White 1.5” Circles
- 2 – Black 1” Circles
- 1 – Pink 1” Circle
- 1 – Medium Black Heart
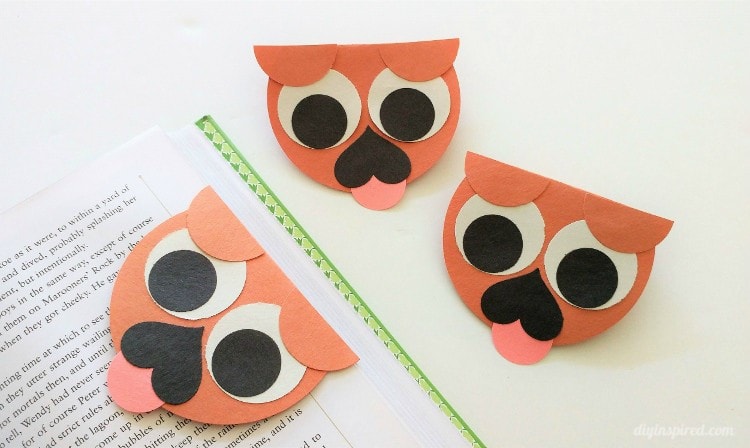
Fold the top of the large brown circle. Assemble the pug face with glue. It’s best to start at the bottom. The pink circle is the tongue of the pug. Glue it to the bottom center. Glue the heart upside down on top of the tongue. Next glue the white part of the eyes, then the black. Cut the small brown circle in half for the ears and glue them on either side, flush with the top of the head.
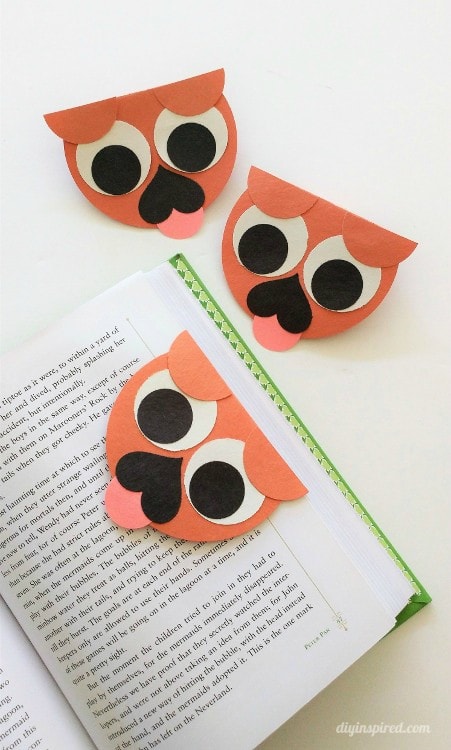
I made five of them and gave them to my daughter yesterday and she loved them. She said she was keeping one and giving the rest to her friends. If you like it, I’d love it I your pinned it!
Like it? Pin it!

Here are a few other DIY Bookmarks I have done:


These are so cute! My son is finishing 3rd grade. Time flies by!
Thank you, Carolyn! Seriously! Where the heck did the time go??