DIY Redwood Serving Tray
Make a Simple Redwood Serving Tray with Humboldt Redwood
This post is brought to you by Humboldt Redwood and The Motherhood. All opinions are my own.
This holiday season, it’s all about #RedwoodDIY! This season’s projects and possibilities extend from outdoors to inside your home. I decided to build a redwood serving tray just in time for Thanksgiving, Christmas, and New Year’s. Much lighter in weight than plastic composite and tropical hardwoods, redwood can be easily cut, sawed, and drilled with regular woodworking tools, making it an ideal material for this seasons DIY projects.
Don’t let the lightness fool you: redwood is one of nature’s strongest building materials. This is why it’s perfect for making a serving tray. You want it light because you are carrying things, however you want it durable as well.
Watch the Video
Time: 1-2 Hours (plus dry time)
Materials:
- 1- 1X2 Humboldt Redwood Plank
- 1- 1X4 Humboldt Redwood Plank
- Saw
- Sander
- Construction Glue
- Stencil
- Paint
- Spouncer
- Hardware of Choice
- Drill
Instructions:
Preparing the Redwood
I went to Ganahl Lumber Co. to choose my redwood pieces. Redwood’s rich, warm color and beauty will create a breathtaking first impression. I wanted to choose pieces with natural knots to add character.
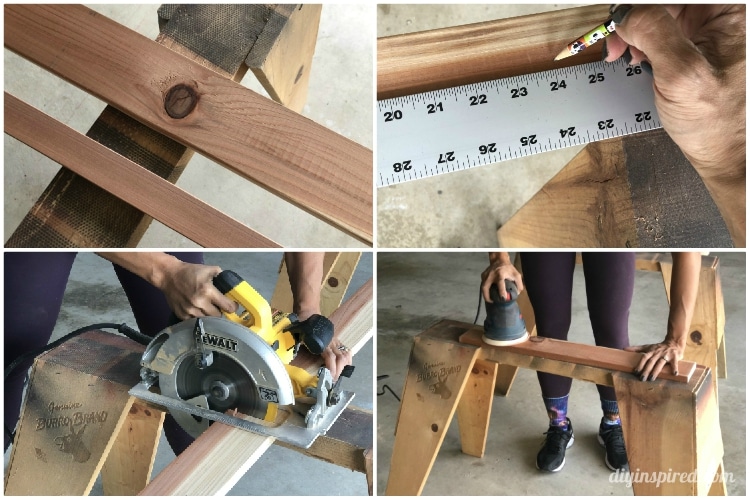
First, measure the 1X4 into four 24” pieces. Mark and cut them with a saw. Next, sand each piece on all sides. Remove any dust and debris with a clean cloth.
Cut the 1X2 in two 13.75” pieces. Again, sand all sides and remove any dust and debris. You are now ready to assemble the try.
Assembling the Tray
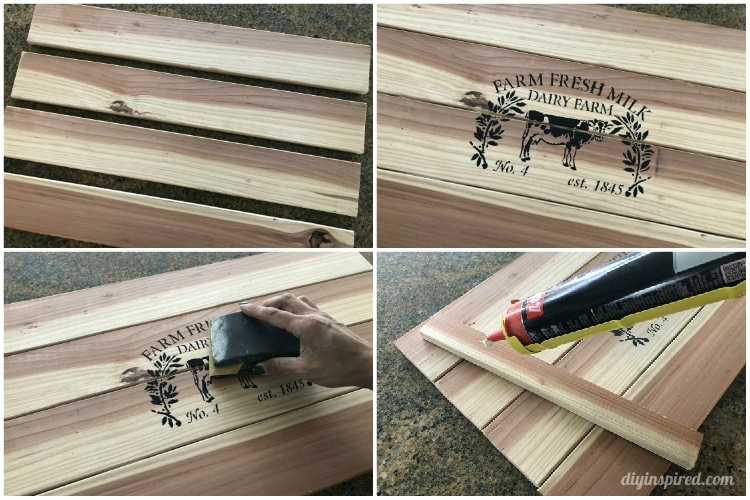
I chose to adhere the pieces with liquid nails. Apply the liquid nail to each slat and push them together. Make sure to remove any access because you don’t want it showing through the slats of the tray. Allow it to dry overnight.
Stenciling the Tray
I chose a fun farmhouse stencil that I purchased from Hobby Lobby. I centered the stencil, taped it down and used a spouncer brush to stencil the image onto the tray. Be sure not to use too much paint. Remove any access before applying it. Remove the stencil and allow it to dry completely.
Once the paint is dry, lightly sand the image with 120 grit sand paper. Clean off any dust and debris with a clean cloth.
Putting it All Together
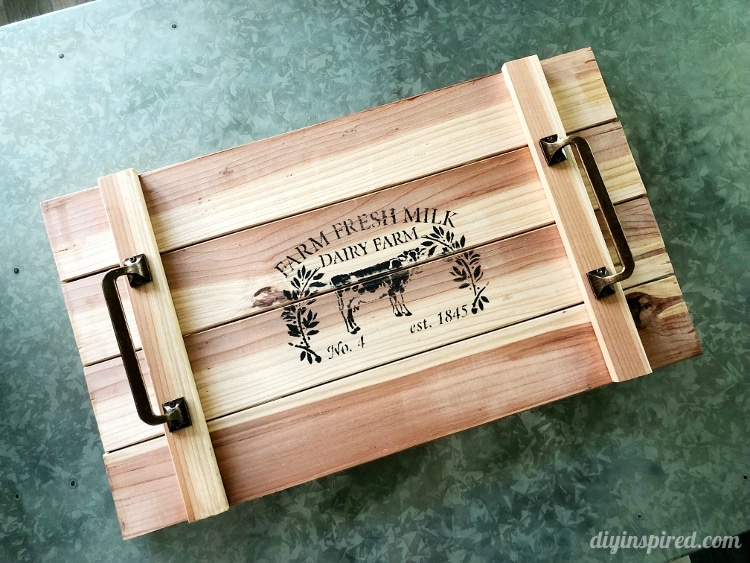
Lastly, a glued the 1X2’s onto each side of the tray. I chose to place them about 2.5” from the edge of the tray. Then, I added the hardware by screwing it in with a drill.
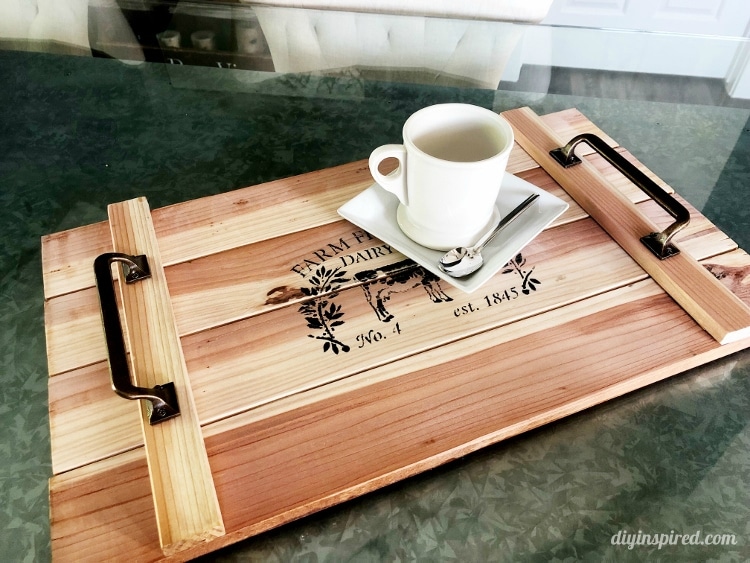
That’s it! This simple DIY would also make a great handmade hostess gift for all your holiday parties coming up this season!
About Humboldt Redwood
Humboldt Redwood products are grown and harvested in a responsible, ethical manner with an eye for long-term sustainability; environmental stewardship is the cornerstone of our corporate culture.
Whether you’re looking to build a deck or pergola, or a simple serving tray, know that your choice to build with redwood is an environmentally sustainable one!


We adore how this came out! The wood looks warm and inviting, and the stencil was a fun, playful touch. Great work! Can’t wait to share 🙂
Thank you so much!
Could this be used as a cutting board, minus the short pieces and handles? I love the striped colors of the wood and the stencil is adorable!
I’m new to your site plan to return again. Thanks!
Thank you!!! For a cutting board, I would suggest a denser wood like maple or walnut.