DIY Repurposed American Flag
How to Patina Unfinished Wood to Make a Repurposed American Flag
This repurposed American flag may be one of my most favorite patriotic DIY’s. A close second may be the American flag I made from a left over flooring plank.
As you may have seen already, I have been doing a lot of wood burning projects like this I Love You More Sign:
Great for Memorial Day or Independence Day décor, this rustic repurposed American flag uses the same technique. Here is how I made it.
Total Cost: About $15.00
Time: About 2-3 Hours
This list contains affiliate links for products I used and recommend.
Materials:
- 7 – 1 in. X 4 in. X 42 in. Cedar French Gothic Pickets
- 1 – .25 in. X 1.5 in. X 4 feet Poplar Hobby Board
- 14 – #6 X .75 in. Flat Head Phillips Wood Screws
- Drill
- Hand Torch

- Propane
- 120 Grit Sand Paper
- Hand Saw
- Brown Paint (to match the wood) and White Paint (for stars)
- Paint Brush
- Pouncer
- Painter’s Tape
- 18 in. X 12 in. Star Stencil
- Work Gloves and Goggles
- Brush
- Wood Glue

 (to match the wood) and White Paint (for stars)

Watch the Video Tutorial
How to Patina Unfinished Wood
I purchased the fence pickets from Home Depot for less than $1.50 each. My torch of choice is the Bernzomatic TS4000 . It’s perfect for small projects like this one.
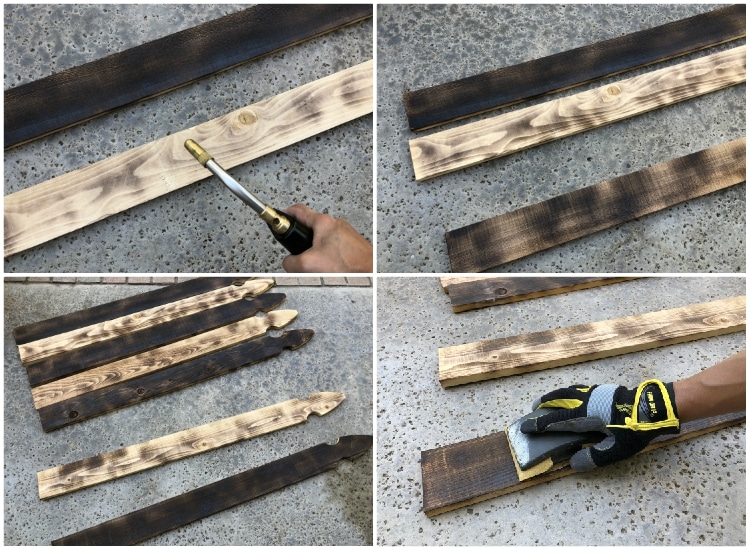
Start by igniting the torch and moving it in a steady back and forth motion against the wood grain. Hold it closer for a dark burn, and further away for a lighter burn. Remember that the finished color will be lighter because you will be sanding it. It helps to place the pickets next to one another to see the variation of color.
Next, sand each picket with 120 grit sand paper. I chose to use a sand block versus an electric sander because I have more control. It gets dusty so have a dust brush nearby to brush off and debris.
Assembling the Repurposed American Flag
To assemble the flag, I glued it first.
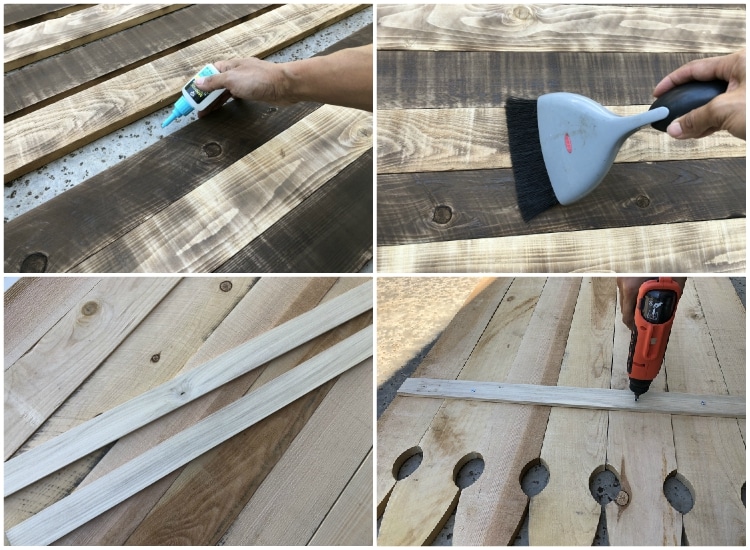
I used DAP RapidFuse, which holds wood very well. I applied the glue to one side and then held it together for 30 seconds. Glue each picket one by one, again holding it together for 30 seconds each. Allow it to cure for 30 minutes and then turn it over to the back. In hindsight, it would be easier to turn the flag over and then apply the glue, but either way works!
The glue alone may work, however I wanted to reinforce it. I used a hand saw to cut the hobby board in half. Place it on each side and screw in one screw per picker per side.
Painting and Stenciling the Flag
The folks at Stencil Revolution sent me this star stencil and it was perfect for this project.
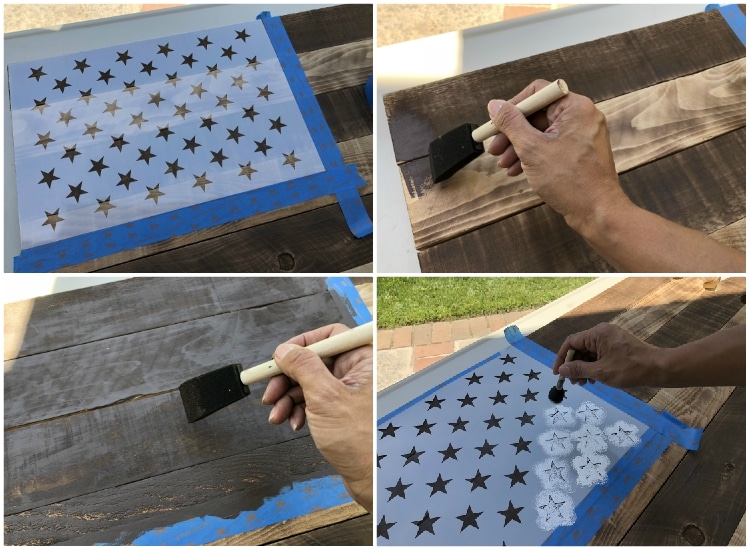
I used it as a guide to paint the square, taping it off with painter’s tape. The paint I used was Martha Stewart’s multi surface chalkboard paint in Vanilla Bean , but you can use any color that will match. Note that it does not need to be chalkboard paint. Any acrylic craft paint will work.
Once the square was dry I placed the stencil on top and taped it down on all four sides. Using a pouncer brush, I used a small amount of white paint to dap on top of the star stencil. Be sure to dap off the excess paint to prevent bleeding. You don’t need much. Once you are done you can remove the stencil immediately.
Lastly, once the paint is dry, lightly sand it.
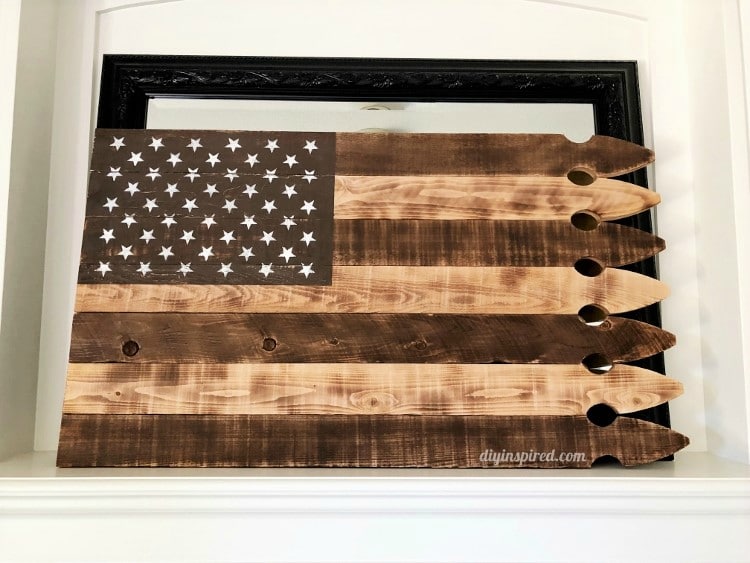
That’s it! It turned out great. You can use it both indoor and outdoor.
If you liked this, here are some of my other projects you may enjoy. I would love it if you subscribed to my YouTube channel!
Like it? Pin it!


You do the best tutorials. So easy to understand. Love it! I like your creativity, you have super job showing this great project. Thanks for sharing this project with us.
Thank you so much! That means a lot to me!