DIY Rope Basket with Yarn
Once again I just had to make something to go with the new craft room makeover. This time, I am sharing how to make a DIY rope basket with yarn to add a pop of color. In case you missed them check out my other Craft Room Maker posts:
- Craft Room Makeover: Paint and Color Consultation
- Craft Room Tour Makeover Reveal
- How to Paint a Chalkboard Wall
- The Easiest Way to Spray Paint Knobs
- Easy DIY Double Hoop Wall Hanging
- DIY Fabric Covered Switchplates
- Emerald Green and Gold DIY Stool Makeover
This project took me two days only because of all the daily interruptions with life. I took my time. If you really wanted to bust it out, you could finish it in a couple hours. Here is what you need.
Materials:
- Cotton Rope Cord

- Hot Glue and Glue Gun
- Yarn
- Scissors
- Cheap Plastic Waste Basket (this will be used as a guide)


Watch the Video Instructions:
Instructions:
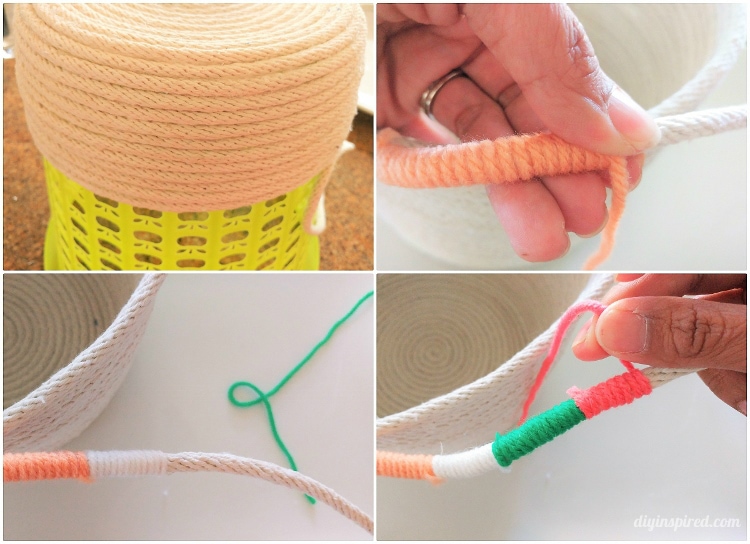
I bought this rope at OSH on sale for $.08 per foot. I was so excited about the sale, I bought 200 feet. Ha! I wasn’t sure how much I needed for this, but I would estimate that I used a little less than half of it. Start by taking the end of the rope and coiling it to form a circle. Use hot glue to start the circle. This is the base of the basket. Continue to coil it around and glue. I found a cheap waste basket for $1.50 to use as a guide. I wanted to use a guide for several reasons: 1) to help with the shape, 2) to help with the height, and 3) to fit snugly inside in case I wanted to line the waste basket with a plastic trash bag.
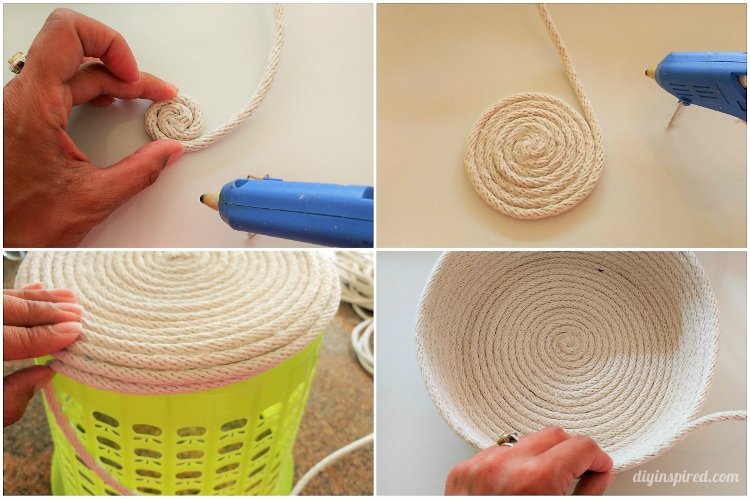
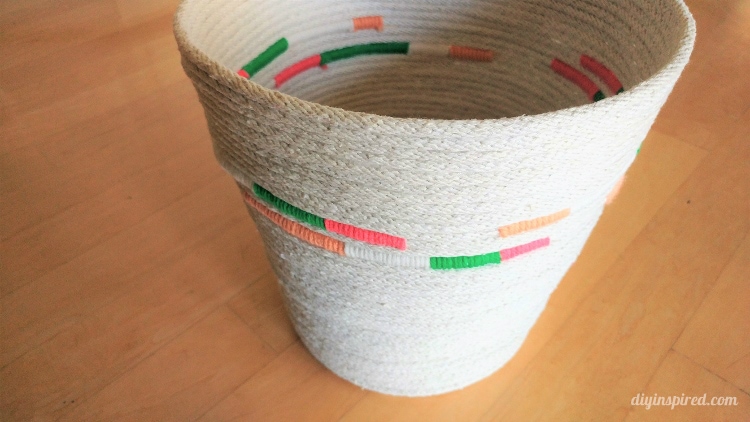
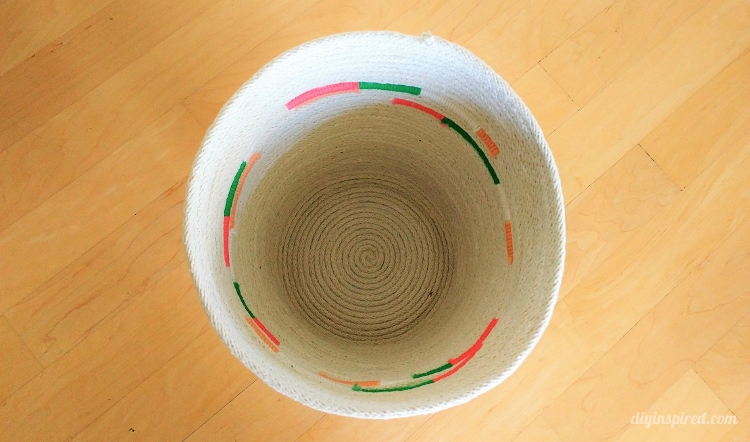
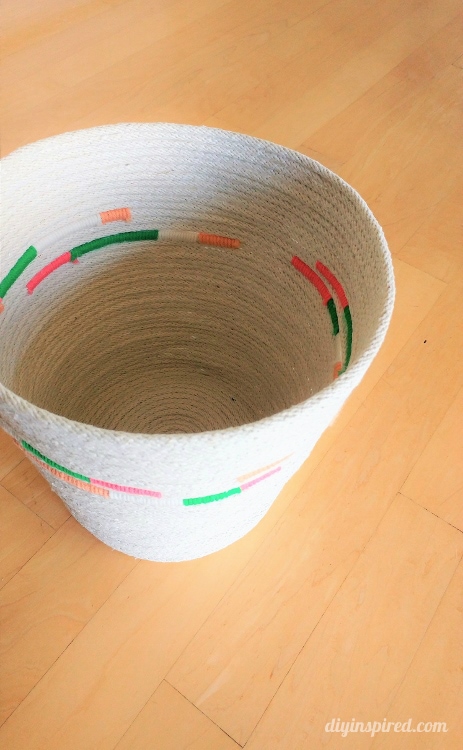
I used the waste basket periodically to make sure the shape was correct. Next, I wanted to add some color to match the color inspiration of my craft room. I randomly cut pieces of yarn to wrap around the rope using hot glue to secure it. I added a random design using four different colors. Continue to wrap the rope around with the yarn. Make sure the ends of the yarn are hidden in between the rope. Snip the end of the rope at the top when you are satisfied with the height and glue it down.
Here are some pictures.

Make a matching Double Hoop Wall Hanging: