Upcycled Dining Room Chandelier
BE FORWARNED!!! This post contains a FAIL! I think I added too much bling to this attempt at my upcycled dining room chandelier. Let me explain.
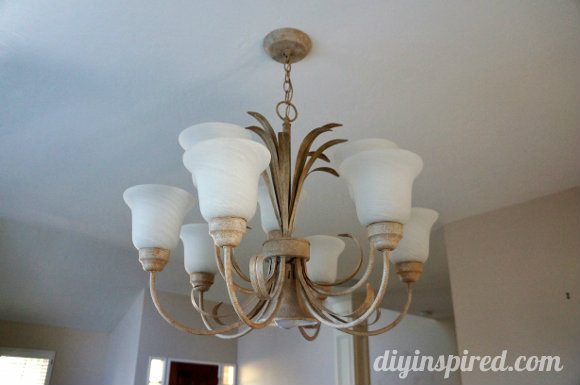
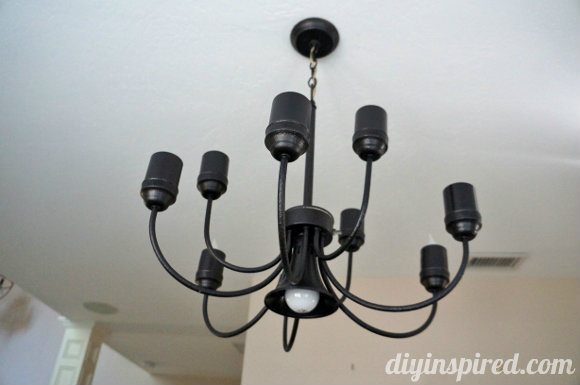
Here is the chandelier before… nice… but not our style.
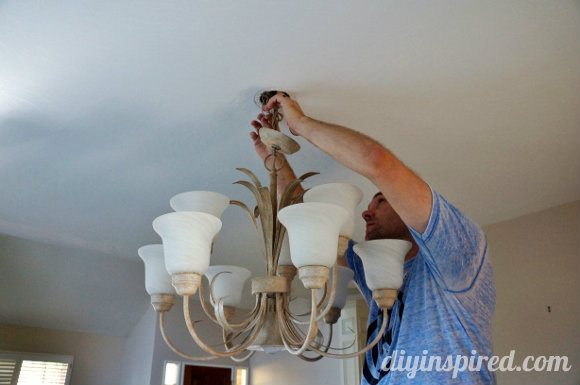
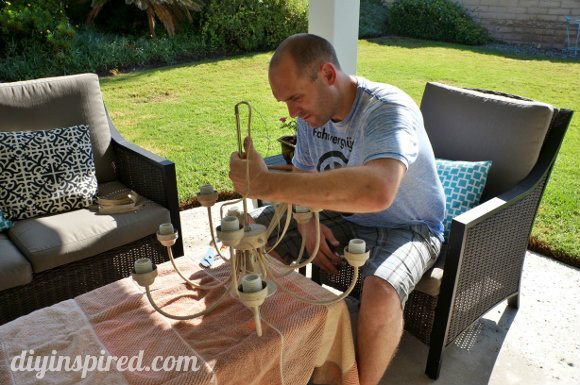
My husband and I took it down and he decided he wanted to try and upcycle it instead of selling it. He took the whole thing apart because we wanted to get rid of the metal leaves.
Once they were removed, he took it apart and used a metal file to smooth down the rough areas.

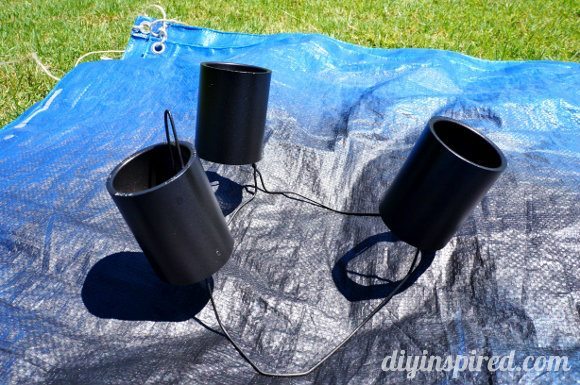
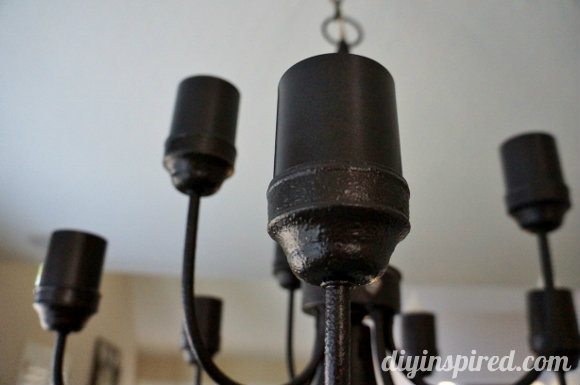
We bought some PVC pipe to cover part of the light bulb (BAD idea… because the bulbs were too hot for them! Of course I didn’t know that during these photos so let me continue…)

He spray painted it all black.
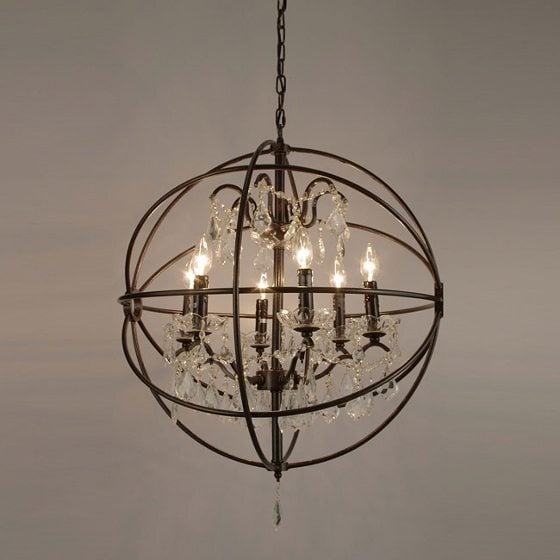
Meanwhile, I decided to turn this light into a sparkly chandelier to match these lighting fixtures we bought.
I bought beads .
.
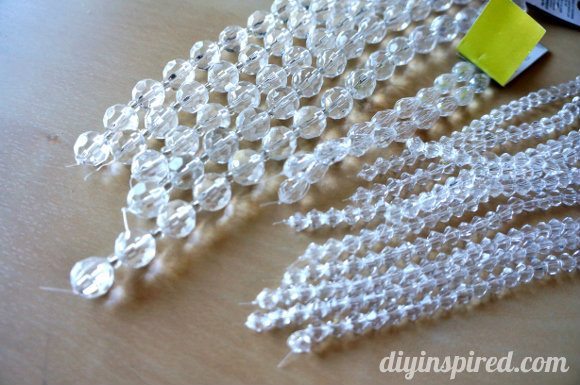
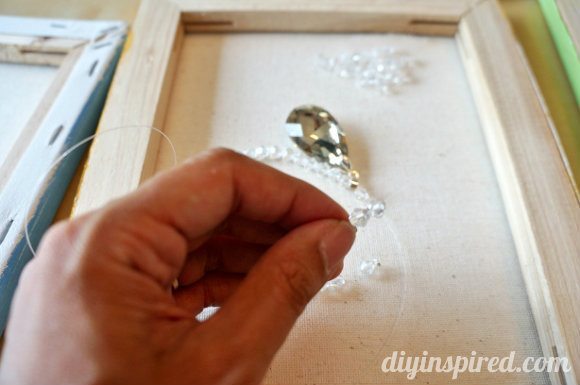
I strung them one by one. Pretty right?? Not so much… you’ll see!
My husband but the light back up after the paint was dry and I was still stringing beads (very tedious). Not bad!
Then I attempted to add them to the chandelier…
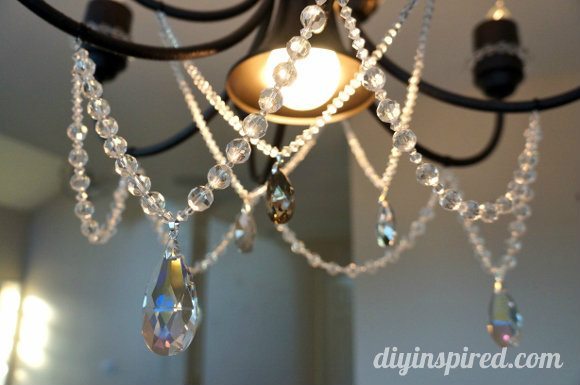
It’s not THAT bad…but it didn’t look quite right. I think it needed more, but I wasn’t willing to spend more money.
THEN, we discovered that the PVC pipe started deforming… Ooooops!!! SOOOOO we decided that we liked the light without the PVC pipe and the sparkly beads. What do you think???? FAIL??? Should we take the whole thing down? Maybe try some Edison bulbs instead?


I think you’re on the right track with it… maybe you just need some simple but pretty light covers. The black/ no leaves look is way better than what you started with!!!
Thanks Dawn! I’m having trouble finding covers that I like too. I’ll keep looking!
Place a glass candle drip holder over socket before putting bulb on (they even come with crystals attached). Then start your bead strands from the top. I think you’d get a very similar look to your inspiration piece. That’s my 2 cents! Good luck.
Great idea! I need to look out for those. Thanks, Charlotte!
What if you cut the neck off of some colored bottles and just used colored glass for some simple light covers? I think beer bottles might be about the right size, and there are greens, browns, and even cobalt blues. Or clear ones that could be jazzed up with some glass enamel paint. Just a thought.
Oooooooo! So many great ideas! You know I’m a sucker for re-use!
Dinah Wulf, love the changes in the chandelier!! I have one in my dining room I want to paint too. I found some Discontinued bulb covers for ceiling fan lights at Wal-Mart for $1 and replaced the shades that I hatred. Since my light is like yours the clear covers just sit on he base of each light/candle.
Wow! What a deal! Thanks so much, Carol. You should post a picture of your chandelier on my Facebook page. I’d love to see it! http://www.facebook.com/diyinspired
Did you find a good solution to the PVC problem? I just did the same thing because I couldn’t figure out another way to create the look of candlesticks on my non-candlestick chandelier. But the PVC is starting to smell hot! I’d love to salvage this project.
I didn’t! We decided to just keep them off 🙁 I actually like the look without (or maybe I’m just accustomed to it! Ha!). Here’s the “after”: https://diyinspired.com/dining-room-makeover-reveal/
Can you tell me what paint you used? I want to refinish my light.
Hi Barbara! I’m so sorry! I don’t remember the exact paint we used, but I believe it was a spray paint and primer in one.