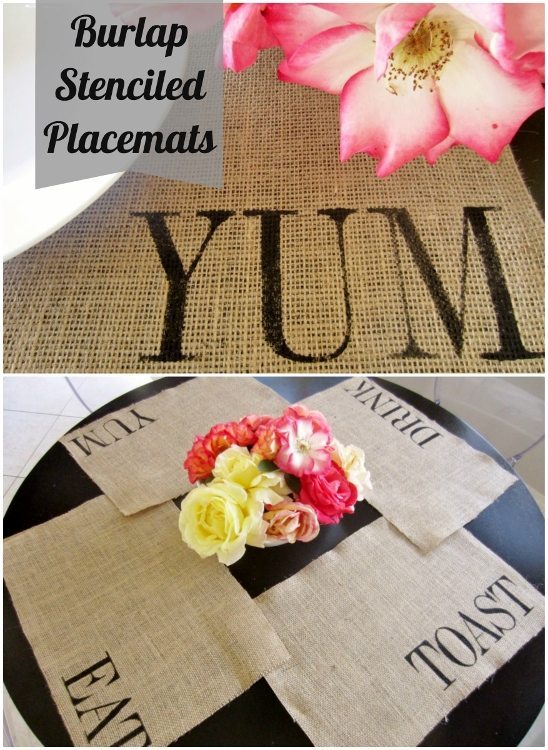
Burlap Stenciled Placemats
How to make burlap stenciled placemats with tips for stenciling and crafting and caring for burlap.
I love the rustic look of burlap and I wanted to try and make my own placemats. I decided to make them more unique by stenciling them.
I got these beautiful stencils from iStencils. They have a full unique line of stencils for walls, clothing, airbrushing, and just about any kind of craft. I originally thought about creating a custom made stencil and found that Stencils Online can do that by simply providing the art work. They will even make custom stencil quotes that are perfect for painting on walls. Ultimately I decided to go with the alphabet letter stencils. There were SO many fonts and styles available to choose from and finally I settled on 3 inch upper case industrial letters for burlap crafts like this one.
Here is how I made my Burlap Stenciled Placemats. I will share some burlap and stenciling tips along the way.
Time: 1-2 hours
Materials: Contains affiliate links for recommended materials.
- Burlap fabric
- Scissors
- Straight Edge
- Stencils
- Spouncer

- Craft Paint
- Fray Check


I purchased my burlap at a fabric store for $3.99 a yard, and of course I had the 40% off coupon.
An average placemat is 18.5” by 12.5”.
")
I found it easiest to use an existing placemat as a guide to cut your burlap BEFORE you wash or clean it.
Crafting and Caring for Burlap
Burlap Tip #1 Washing: I recommend hand washing burlap instead of machine washing. You can machine wash it in COLD, however be prepared for a messy lint trap and a lot of fraying. More on cleaning burlap to come…
Cut out the desired amount of placemats. It’s OK to cut two placemats at a time.
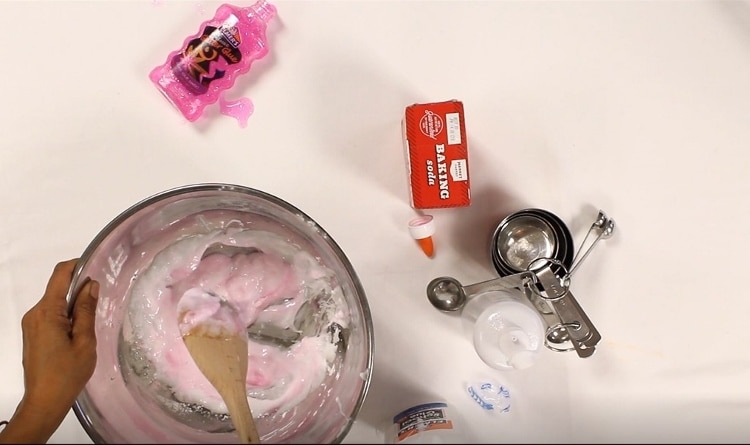
Burlap Tip #2 Fraying: Use a liquid seam sealant like, Fray Check to stop the burlap from fraying. Protect your work surface with cardboard and keep the sealant out of reach from children. Allow it to dry completely (about 30 minutes).
Burlap Tip #3 Wrinkles: Next, using spray starch iron the wrinkles out of your burlap placemat. I used a linen (high) setting and it worked nicely.
Stenciling Tips and Tricks
Now, leaving the cardboard to protect your surface, you are ready to start stenciling.
Stenciling Tip #1 Brushes: Different paint brushes work; however I highly recommend using a spouncer, especially for this project.
I am using acrylic craft paint for this project.
Stenciling Tip #2 Paint: For small craft projects like this, the less paint you use, the better. Apply two light coats (in general) to maintain clean lines. Also consider using tape or another adhesive to help keep your stencil in place. I personally didn’t use any because the iStencil I have was easy to control.
In an up and down dabbing motion, gently but firmly apply the paint. One coat works perfectly for this project.
")
I am stenciling words, so started with the last letter in each word first on the bottom right hand corner of my placemat. The stencil makes it so easy to align each word. Allow these letters to dry (ten minutes-ish).
Stenciling Tip #3 Cleaning: In the meantime, make sure you wash your used stencils with a gentle soap and water and allow it to dry flat.
BONUS Burlap Tip: Take these placemats outside and give them a shake! Shake off the excess burlap debris. Trust me, you’ll thank me later…
Here are a few AFTER photos of my Burlap Stenciled Placemats.

")
")
")
Four Tips for Crafting with Burlap!
More Burlap Craft Ideas:
- Stenciled Burlap Sacks DIY
- DIY Pumpkin Ribbon Wreath
- Centerpiece with Stenciled Burlap
- Burlap Wire Hanger Wreath Tutorial
- Repurposed Earring Burlap and Feather Napkin Rings
- How to Make a Dog Bowl Mat
Burlap Accent Crafts:
- Upcycled Metal Pumpkin Tutorial
- Hanging Front Door Wreath DIY
- Door Decoration: One Basket Four Ways
- Many, Many, Many More DIY Inspired Ideas!
Update: I originally wrote and published this post on April 11, 2012. Since then I have updated it to make it better and more informative.


I LOVE THESE!!!
Thank you so much! Thanks for commenting! 🙂
Done—-love these place mats too !!! You are so creative
Thank you thank you!!!
The placemats are so fun! I love the idea…I want to use the stencils for a doormat with our name on it!
Such a great project! And would make a lovely gift for newlyweds, too!
Love the projects using burlap and stencils.
Like both on facebook.
What a great idea! You are so creative!
I like you both on FB. Thank you for the chance.
Dana J Valle
like both pages 🙂 I love those place mats, so simple but unique!
I liked both! Neat project. My sister is getting married soon. Makes for an awesome wedding gift idea.
SO trying this! Thanks!
Thanks for using the spouncer brush tip! I saw your headline and was going to leave you a comment asking about what to use because I always have paint get everywhere I don’t want it. I will have to give it a try, thanks!
You’re welcome! Thank you Gina for commenting and stopping by!!
Ditto for me on this. Thanks!
Just wanted you to know I featured your placemats on my blog today!
Claire! The post was lovely! Thank you you so much!!
Love these. great idea
Saved as a favorite, I like your web site!
Love this idea and can’t wait to make my own! I’ve done some painting and stenciling on burlap before and just love how it looks. Thanks!
Great! They last forever too!!
And I just subscribed! You have a great DIY blog!
Awesome! Thanks so much, Sarah!!!